Get Your ALL ACCESS Shop Pass here →


What Makes Ice Melt Faster?
What makes ice melt faster? Let’s investigate with simple ice melting experiments that kids of varying ages can enjoy. Learn about lowered freezing points, freezing depression points, and more! We love simple science experiments for kids!
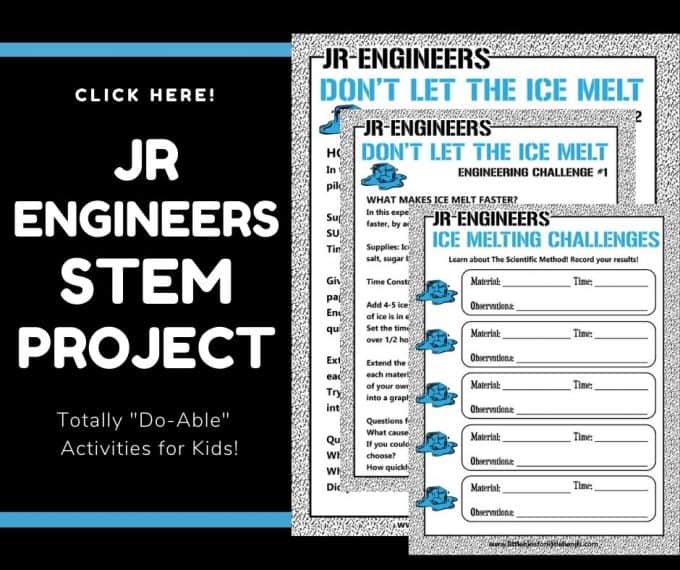
Free Printable Ice Melting Experiment Worksheets!
Let’s get right to learning all about ice. Head to the kitchen, open the freezer and be prepared to experiment with these different ice projects.
Grade Level: Suitable for Kindergarten through 3rd Grade
Project #1: What Makes Ice Melt Faster?
In this experiment, you will investigate what makes ice melt faster, by adding several different solids to your ice. Make sure to use the scientific method and pick variables for this project.
💡 Make ice cream in a bag and homemade slushies to explore the concepts further.
Supplies Needed:
- Muffin tin, jars, or containers
- Various solids. You can start with table salt and sugar, but also include different types of salt, baking soda, sand or dirt etc.
- Stopwatch or clock to determine the time of the experiment

Experiment Set Up:
STEP 1: Add 4 to 5 ice cubes to 6 cupcake cups. Make sure the same amount of ice is in each one.
STEP 2: Add 3 tablespoons of each solid to a separate container of ice.
- Add 3 tablespoons of baking soda to cup #1.
- Add 3 tablespoons of salt to cup #2.
- Add 3 tablespoons of sand to cup #3.
Cup #4, cup #5 and cup #6 are your controls and will have nothing added to the ice.
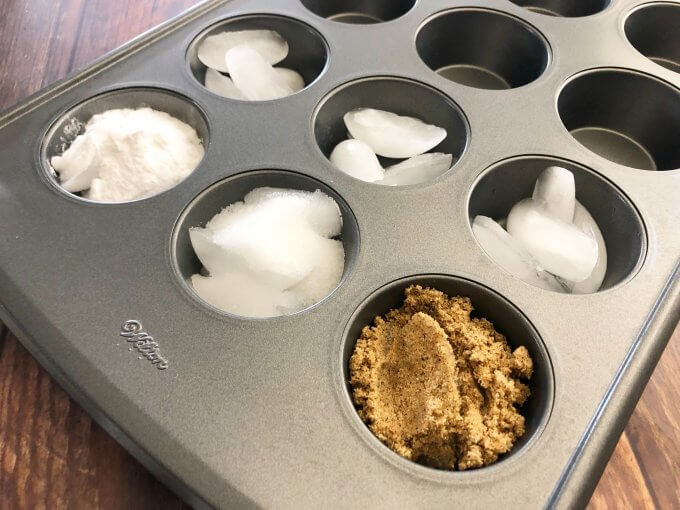
STEP 3: Set the timer to check back on the ice cubes every 10 minutes over 1/2 hour and record your results. Then draw your conclusions.
What did you find caused the ice to melt fastest?
EXTENSION: Use a timer to record how long each material took to melt the ice. Record the results. Try adding solids of your own choice and record that data, too. Now, turn the data into a graph!
Science Explanation: Why Does Salt Melt Ice?
Unsurprisingly, adding salt (sodium chloride or NaCl) made the ice melt fastest. Baking soda was second as it’s a type of salt and can lower the freezing point of water. However, it is a powder. Sand did not do much! So why does salt melt ice?
Salt lowers water’s freezing or melting point. It interferes with ice crystals, and by mixing with the liquid water on the melting ice, it speeds up the melting process. This is also called a lowered freezing point.
💡 Read more about the Freezing Point Depression further below.
Project #2: How Quickly Can Ice Melt?
In this experiment, you will explore how quickly you can melt a pile of ice cubes! At what temperature does ice melt? Read on to learn more!
The challenge is to see how quickly you can melt the ice cubes. This can be done individually or in small groups. If you choose to use the small group format, make sure to allow a few minutes for the kids to brainstorm ideas together.
- Paper towels
- Optional: Table Salt (sodium chloride, NaCl), Cloth, Paper, Small Plastic Food Containers
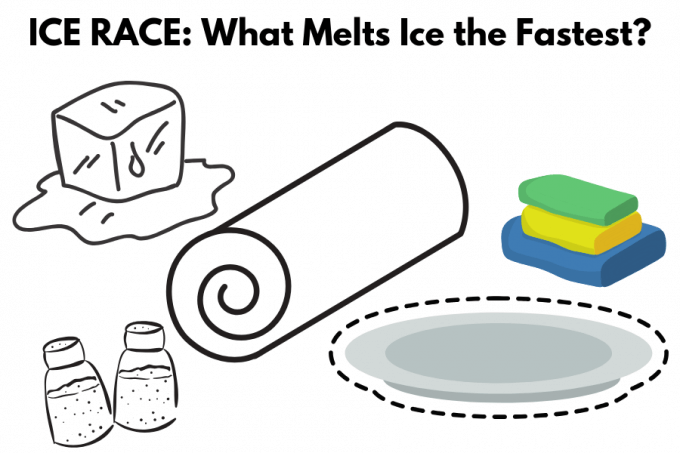
STEP 1: Give each kiddo or group of kids the materials, including paper towels and a specific number of ice cubes on a plate.
STEP 2: Encourage the kids to use the materials to try and melt the ice quickly!
STEP 3: When the race is over (set a specific amount of time that works for you), ask groups to share the steps of their melting process. Discuss what worked and why. Also, discuss what you would do differently the next time!
💡 Use a timer and record how long it took each kiddo or group of kids to melt the ice. Record the results. Try two more times and record that data. Now, turn the data into a graph!

The Science: Freezing Point Depression
Freezing point depression explains why adding something to a liquid, like salt to water, can cause it to freeze at a lower temperature than it usually would (lowered freezing point).
Here’s an example to help you understand: Think about plain water. It freezes and turns into ice at 32°F (0°C). But if you add salt (sodium chloride) to the water, the freezing point drops. The water now has to be even colder than 32°F to freeze! This is why salt is often spread on icy roads in winter – it helps melt the ice by lowering the water’s freezing point.
💡 The salt and water, when mixed, become a chemical solution !
In simple terms, adding certain substances (like salt) to a liquid makes it harder for that liquid to freeze! Ice at the freezing point of water has less energy or heat than water at the same temperature!
💡 Learn more about the freezing point of water with our freezing water experiment .
More Ways to Melt Ice Cubes
There are many possible ways to melt ice. The simplest way is just to leave the ice to melt at room temperature. The heat energy in the warmer room works to break up the ice structure to turn it to water. We see this all the time with the ice cubes in our drink glasses or if we accidentally leave one out on the counter.
You could hold the ice cube in your hand (brrr, chilly) to speed up the melting process since your body is usually warmer than the room. To make it melt even faster this way, try rubbing your hands together really fast before holding the ice cube. Rubbing your hands together quickly creates friction, which adds more heat through an increased temperature!
Another way to generate more heat and a higher temperature is to rub the ice cube on a piece of cloth.
How about placing the ice cube on a dark piece of cloth or paper and placing it in sunlight? Dark colors retain heat from sunlight better than light colors, so you might feel hotter wearing a dark T-shirt in the middle of a hot summer day!
💡 See our what colors absorb heat best experiment.
Project #3: How Do You Keep Ice From Melting?
In this third experiment, you will investigate how to keep ice from melting. Instead of seeing how fast ice melts, let’s try to keep it cool instead!
The challenge is to see how slowly you can keep the ice from melting by reducing the amount of heat or energy that surrounds the ice. This can also be done individually or in small groups. Remember, if you do choose to use the small group format, make sure to allow for time for the kids to brainstorm ideas together.
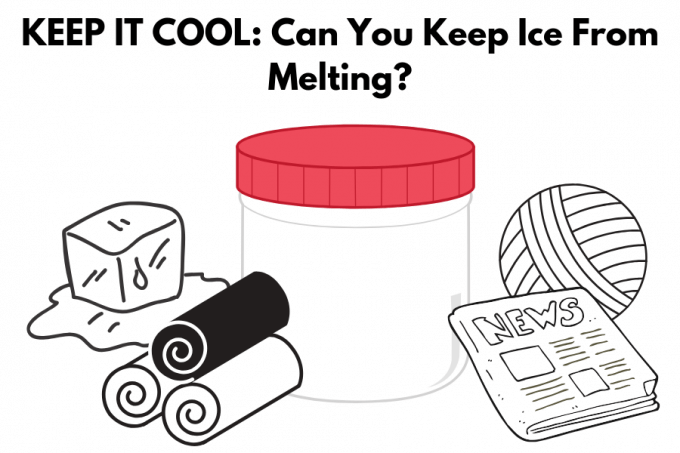
- Small zip-top bags
- Small plastic containers (as close to the same size as possible so they are uniform)
- Various materials (eg Aluminum foil, cotton balls, paper towels, rubber bands)
💡 There are quite a few items that can be potentially used for this ice cube insulation challenge! Check out the recycling bin, junk drawer, garage, and more. This is also where our dollar store engineering kit comes in handy. You can use the items you have available for a budget-friendly STEM challenge.
STEP 1: Brainstorm. What are the best materials available to keep the ice from melting?
STEP 2: Decide what materials or combination of materials you want to use to keep your ice cubes from melting by insulating them! Create one or more insulated containers to test your ideas. You can choose a specific amount of time for this portion of the project or split the STEM challenge up over several days.
STEP 3: When all the insulated containers are finished, place an ice cube in a small zip-top plastic bag and then place it in the insulated container. Make sure to put the lids on!
💡 As a control , you will want to place a zip-top bag, with an ice cube into it, in a similar container that is not insulated. This control container is for comparison. By creating a control, you make it possible to determine whether the materials (variables) you chose are responsible for the outcome!
STEP 4: Place all the containers in a cool dry place away from a heat source or direct sunlight. No extra energy is needed here!
STEP 5: Check your containers every 10 minutes. Notice any differences Record your observations until all of the ice is completely melted. Make sure you do not handle the ice or remove the ice from the container while you make your observations.
STEP 6: Think about what materials worked best and why. How can you improve your results?
Science Explanation: How Insulation Works
Everyone knows that when you remove ice from the freezer, it will melt over time. However, most of us don’t think about why it happens. The air around the ice cubes is usually warmer than the ice and it causes the ice (solid) to change into water (liquid). States of matter too!
So, if you do not want the ice to melt, you need to keep the warm air (heat energy) away from the ice by using an insulating material. Some great insulators just for a hint are felt, newspaper, and wool. Insulation prevents the transfer of heat to the ice so the ice crystals stay icy and cold longer.
Insulation is also used to keep our houses warm in the winter in cold parts of the world by keeping the cold out! Additionally, insulation can keep the heat out of a house on a hot day too! Insulation can keep up comfortably when the temperature drops and when it rises!
💡 Learn more about insulation with this insulation experiment !
Printable Science Projects For Kids
If you’re looking to grab all of our printable science projects in one convenient place plus exclusive worksheets and bonuses like a STEAM Project pack, our Science Project Pack is what you need! Over 300+ Pages!
- Bonus Quick Grab Packs for Biology, Earth Science, Chemistry, and Physics
- 90+ classic science activities with journal pages, supply lists, set up and process, and science information. NEW! Activity-specific observation pages!
- Best science practices posters and our original science method process folders for extra alternatives!
- Be a Collector activities pack introduces kids to the world of making collections through the eyes of a scientist. What will they collect first?
- Know the Words Science vocabulary pack includes flashcards, crosswords, and word searches that illuminate keywords in the experiments!
- My science journal writing prompts explore what it means to be a scientist!
- Bonus STEAM Project Pack: Art meets science with doable projects!
- Pingback: 40+ Creative & Easy Ways to Play with Ice - HAPPY TODDLER PLAYTIME
I love your stuff! but why is it so wordy….taakes a lot of ink to print out even the simple stuff….just give list of ingredients……about 15 great ideas but didn’t print out one becasuse they were all 8 to 12 pages long
HI, an article like this is not meant to be printed which is why it’s not helpful to you. Our shop offers paid packs for download though.
Comments are closed.

Subscribe to receive a free 5-Day STEM Challenge Guide
~ projects to try now ~.

July 24, 2014
What Makes Ice Melt Fastest?
A chemistry challenge from Science Buddies
By Science Buddies
Key concepts Water Ice Chemistry Solutions Phases of matter Introduction Do you sometimes dump ice cubes into a drink to help keep cool on a hot summer day? Have you ever watched the ice cubes melt and wondered how you could make them melt more slowly—or even faster? In this science activity you will get to try some different, common household substances to try and answer this question: What will help a solid ice cube turn into a liquid puddle the fastest? Background Temperature isn't the only thing that affects how a liquid freezes—and melts. If you've ever made homemade ice cream the old-fashioned way using a hand-crank machine, you probably know that you need ice and salt to freeze the cream mixture. Similarly, if you live in a cold climate, you've probably seen the trucks that salt and sand the streets after a snowfall to prevent ice from building up on the roads. In both of these instances salt is lowering the freezing point of water, which means that the water needs to be colder to turn from liquid into ice. For the ice cream maker, the temperature of the ice–salt mixture can get much lower than if just using normal ice, and this makes it possible to freeze the ice cream mixture. For the salt spread on streets, lowering the freezing point means that ice can melt even when the outdoor temperature is below water’s freezing point. Both of these events demonstrate “freezing point depression.” Salt mixed with water is an example of a chemical solution. In a solution there is a solute (salt in this example) that gets dissolved in a solvent (water in this case). When other substances are mixed with water they may also lower its freezing point. In this science activity you'll investigate how salt, sand and sugar affect water's freezing point. Materials
Four ice cubes (They should all be the same size and shape.)
Four drinking glasses (They should all be identical.)
One-quarter teaspoon measuring spoon
Preparation
On supporting science journalism
If you're enjoying this article, consider supporting our award-winning journalism by subscribing . By purchasing a subscription you are helping to ensure the future of impactful stories about the discoveries and ideas shaping our world today.
Prepare (or purchase) some ice cubes if you do not have any ready. They should all be the same size and shape.
Into each drinking glass place one ice cube. Make sure the ice cube is oriented the same way in each glass. (Tip: If you are using ice cubes from a tray, it helps to let the tray sit at room temperature for about five minutes so that the ice cubes more easily come out of the tray cups and do not break into pieces.)
Carefully sprinkle one-quarter teaspoon (tsp.) of salt over the ice cube in one drinking glass. Then sprinkle one-quarter tsp. of sugar over the cube in another glass and one-quarter tsp. of sand over the ice in the third. Do not sprinkle anything over the ice cube in the fourth glass. (It will be your control.) How do you think the salt, sugar and sand will affect how quickly the ice cubes melt?
Set the drinking glasses aside somewhere indoors, out of direct sunlight.
Watch the ice cubes over time, checking on them every five to 10 minutes. After around 30 minutes, which cube has melted the most? Which is the first one to melt completely? Which is the last?
Overall, how do you think added salt, sugar or sand affects how quickly the ice melts? Can you explain why this might be?
Extra: You could try this activity at different temperatures, such as in the refrigerator or outside on a hot day. How does adding salt, sugar or sand to the cubes affect how quickly they melt when exposed to a hotter or colder environment?
Extra: In this activity you used one-quarter tsp. of each substance, but you could try adding more or less. Does the melting rate depend on the amount of the substance added?
Extra: Identify some other substances to test on the ice cubes. Do other substances help melt the cubes more quickly or do they end up melting more slowly?
[break] Observations and results Did the ice cube sprinkled with table salt melt the fastest? In this activity you tried adding salt, sugar or sand to ice to see whether the substance would help melt the ice. In other words, you wanted to test whether these substances could demonstrate freezing point depression, or the lowering of the ice's freezing point so that it melted into a liquid at a lower temperature than normal. You should have seen that the ice cube with salt sprinkled on it melted faster than any of the other cubes. This is because the amount by which the freezing point is lowered depends on the number of molecules dissolved, but not their chemical nature. (This is an example of what's called a "colligative property.") In the same volume there are more molecules of salt than there are of sugar or sand because the chemical components that make up the salt are much smaller than the sugar or sand. Cleanup Be sure not to pour the sand down a sink drain or garbage disposal! Instead, throw out the damp sand outside or in a trash can. More to explore Salt and Icy Roads , from Science Kids How Does Salt Melt Ice and Snow? , from Highlights What Makes Ice Melt Fastest? , from Science Buddies Make Ice Cream in a Bag , from Science Buddies
This activity brought to you in partnership with Science Buddies
