

Top 15 Light Related Science Experiments
Light experiments lets us unlock some of nature’s most intriguing riddles and appreciate the magic that illuminates our everyday experiences.
We have carefully selected the best light-related experiments, prioritizing fun and educational experiences that will surely engage young minds.
Our compilation of light experiments will illuminate the minds of students and teachers alike. This curated collection offers an extraordinary opportunity to explore the captivating world of light through hands-on activities.
1. Potato Light Bulb
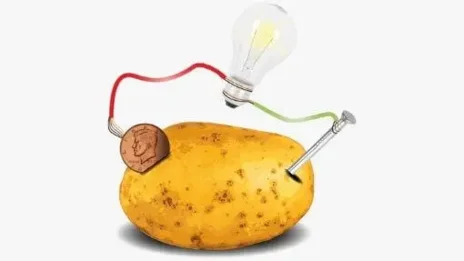
Prepare to be amazed by the power of potatoes in our extraordinary potato light bulb experiments! In these captivating experiments, students will discover the remarkable ability of a humble potato to generate electricity and light up an LED bulb.
Learn more: Potato Light Bulb
2. Bending Light
In these mesmerizing light experiments, students have the opportunity to unravel the mysteries of refraction and explore the wonders of bending light.
3. Light Refraction
By engaging in these experiments, students will not only witness the mesmerizing effects of light refraction but also gain a deeper understanding of the scientific principles behind it.
4. Newton’s Light Spectrum Experiment
Step into the fascinating world of light and color with Newton’s Light Spectrum Experiment! Inspired by the groundbreaking discoveries of Sir Isaac Newton, these captivating experiments will take students on a journey to explore the nature of light.
5. Newton’s Prism Experiment
Learn about optics and unravel the mysteries of light with Newton’s Prism Experiment. Inspired by Sir Isaac Newton’s groundbreaking discoveries, these experiments offer a thrilling opportunity for students to explore the phenomenon of light dispersion and the creation of a vivid spectrum of colors.
6. Total Internal Reflection
These experiments provide a hands-on opportunity for students to observe and investigate how total internal reflection can be harnessed in practical applications such as fiber optics and reflective surfaces.
7. Colored Light Experiments
Prepare to immerse yourself in a vibrant world of colors with these captivating colored light experiments! In these hands-on activities, students will uncover the magic of colored light and its intriguing properties.
8. Capture a Light Wave
By employing innovative techniques and tools, students will learn how to capture and analyze light waves, unraveling the secrets hidden within their intricate patterns.
9. Home-made Kaleidescope
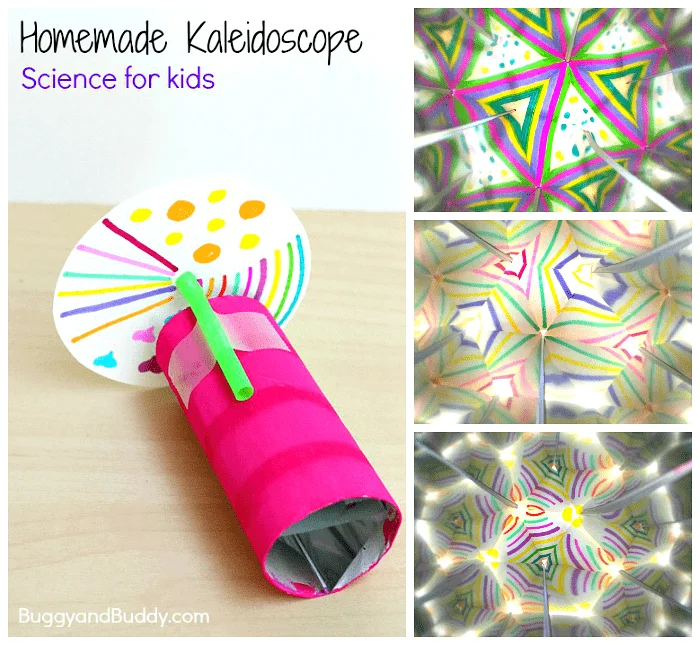
Unleash your creativity and embark on a mesmerizing journey of light and patterns with our homemade kaleidoscope experiments! By constructing your very own kaleidoscope, you’ll unlock optical wonders.
Learn more: Home-made Kaleidescope
10. Push Things with Light
Through engaging hands-on activities, students will experiment with the fascinating principles of photon momentum and the transfer of energy through light.
11. Erase Light with a Laser: The Photon Experiment
Can light be erased? Through hands-on activities, students will discover surprising answers. By utilizing lasers, students will learn about the principles of photon absorption and emission, investigating whether it is possible to erase light.
12. Exploring Shapes and Patterns on a Mirror Box
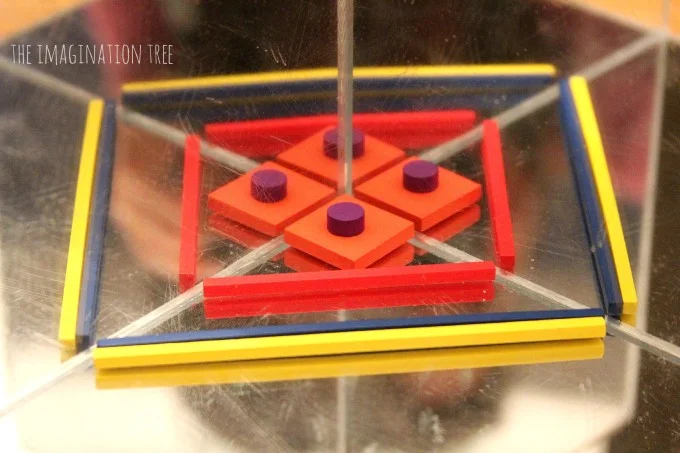
By creating your own mirror box, you’ll learn about optical illusions and reflections. In these experiments, students will explore the fascinating interplay between light, mirrors, and geometry.
Learn more: Exploring Shapes and Patterns on a Mirror Box
13. Electromagnetic Spectrum Experiment
Get ready for an illuminating adventure as we dive into the fascinating world of visible light where students will have the opportunity to explore the electromagnetic spectrum and unravel the mysteries of light.
14. Light Patterns in a Box
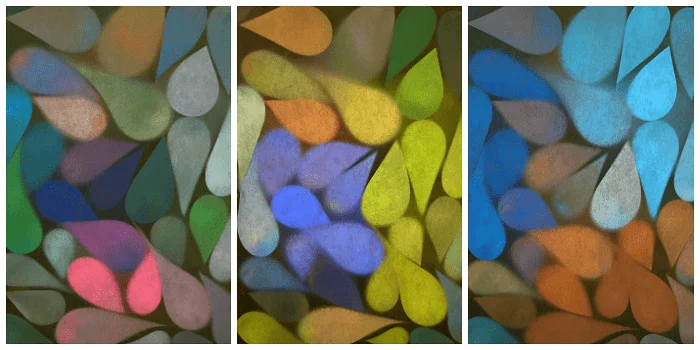
By manipulating light sources and objects, students will witness the magic of shadows, diffraction, and interference, resulting in a dazzling display of intricate patterns and colors.
Learn more: Light Patterns in a Box
15. Light Maze
Prepare to navigate a mesmerizing journey through the enchanting world of light with our captivating light maze experiments! In these immersive activities, students will learn about the magic of manipulating light to create intricate mazes and pathways.
Similar Posts:
- 68 Best Chemistry Experiments: Learn About Chemical Reactions
- Top 100 Fine Motor Skills Activities for Toddlers and Preschoolers
- Top 58 Creative Art Activities for Kids and Preschoolers
Leave a Comment Cancel reply
Save my name and email in this browser for the next time I comment.
Light Wave Experiments
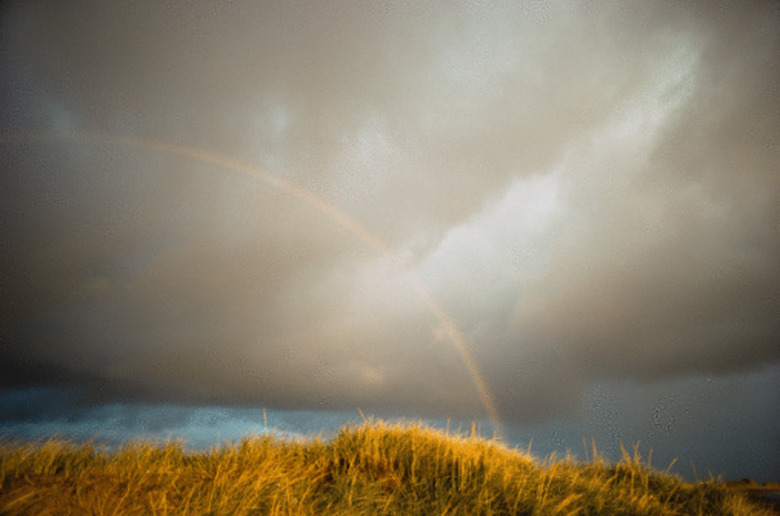
Light waves, which have been found to exhibit characteristics of particles, behave in certain ways that we can observe by experimentation. Light waves diffract in the same manner that waves diffract when they collide with an object. They also undergo interference when passing through or reflecting against objects of different mediums.
Bending Light
Remove the sharp end of a blue tack and glue the top to a penny. Place a solid-colored ceramic bowl on a tabletop, and then place the penny in the bowl, with the tack side facing up. Back away from the bowl until you cannot see the penny. Fill a large glass with water and pour it slowly into the ceramic bowl. From a distance, watch the penny begin to appear as you fill the bowl with water. This demonstrates the ability to bend light over a top or corner, where an object was not visible before.
Sunlight Waves and Particles
Fill one clear plastic cup with tonic water and another clear plastic cup with tap water. Use a felt pen to mark the tonic cup with a "T." Set the cups outside in the sunlight when the sun is at its highest (i.e., noon). Hold a large piece of black paper behind both cups. Examine the color of the water through the sides of the plastic cups. Notice the blue coloration near the top of the tonic cup. The quinine in the tonic absorbs ultraviolet light and emits it as visible light.
Reflecting Light Waves
Obtain a very shiny spoon, preferably a highly polished silver spoon. Notice the reflection of your face on the inside of the spoon. Turn the spoon over and look at your reflection on the outer side of the spoon. The inside of the spoon, i.e., the convex side, makes your face appear larger, while the convex side makes your face appear smaller. This experiment shows how light waves reflect differently from curved surfaces by dispersing in different directions.
Spectrum Rainbow
Stand in your front yard on a warm day, an hour or two before or after noon. Turn your back to the sun. Hold a water hose and adjust the pressure nozzle for a fine mist spray. Spray a large mist against a dark background, like a hedge or tree trunk. You will see all the colors of the spectrum through the mist, beginning with red and ending with indigo and violet. This experiment demonstrates how light waves bend and slow down as they travel through water. Each color bends at its own angle, allowing you see each color individually.
- Science Kids at Home: Sunlight Experiment
- Physicsclassroom.com: Wavelike Behavior of Light
Cite This Article
Stevenson, Chris. "Light Wave Experiments" sciencing.com , https://www.sciencing.com/light-wave-experiments-8347626/. 24 April 2017.
Stevenson, Chris. (2017, April 24). Light Wave Experiments. sciencing.com . Retrieved from https://www.sciencing.com/light-wave-experiments-8347626/
Stevenson, Chris. Light Wave Experiments last modified March 24, 2022. https://www.sciencing.com/light-wave-experiments-8347626/
Recommended
Want to add FUN to your Math block?

Light & Sound Activities & Lesson Plans for First Grade
Teaching Science has definitely not been my favorite subject to teach…even in first grade! It always seemed so challenging to explain such difficult concepts to kids! I’m hopeful these ideas for teaching light & sound worksheets and activities will be as helpful for you as they were for me. 👇
I’m not gonna lie…I often pushed Science off in my plan book because I wouldn’t want to face the questions from first graders {lame, I know!} When my school district decided to move over to the Next Generation Science Standards, I knew I had to get ahead of this curve and dive in deep. I set out to create easy to understand and do science lessons!
I am SO excited for my first unit in the 1st Grade Standards, Sound & Light ! You guys, this labor of love was created so that ALL of us can easily teach the NGSS and actually understand it!
This unit is chock-full of step-by-step lessons, experiments , anchor charts, book suggestions, YouTube videos , response sheets and more to make sure your students understand Sound & Light through hands-on experiments and investigations.
Each lesson includes a learning target, background information, talking points, a book suggestion, and
Background Info for the Teacher & Prepping for Lessons
When I taught from our Science curriculum, I was always so overwhelmed by how much background info was provided! Was I going to be tested at the end? Eeeek!
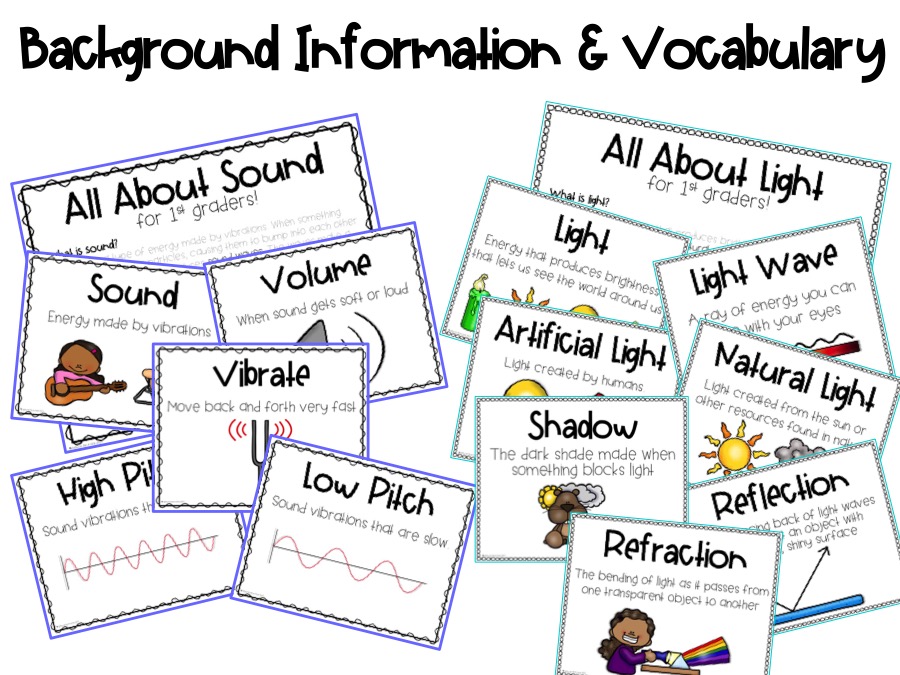
In this Sound & Light Investigations unit I’ve shared just the right amount of information to totally “get” what you’re teaching! There are also easy-to-understand vocabulary posters to help your students understand these big ideas!
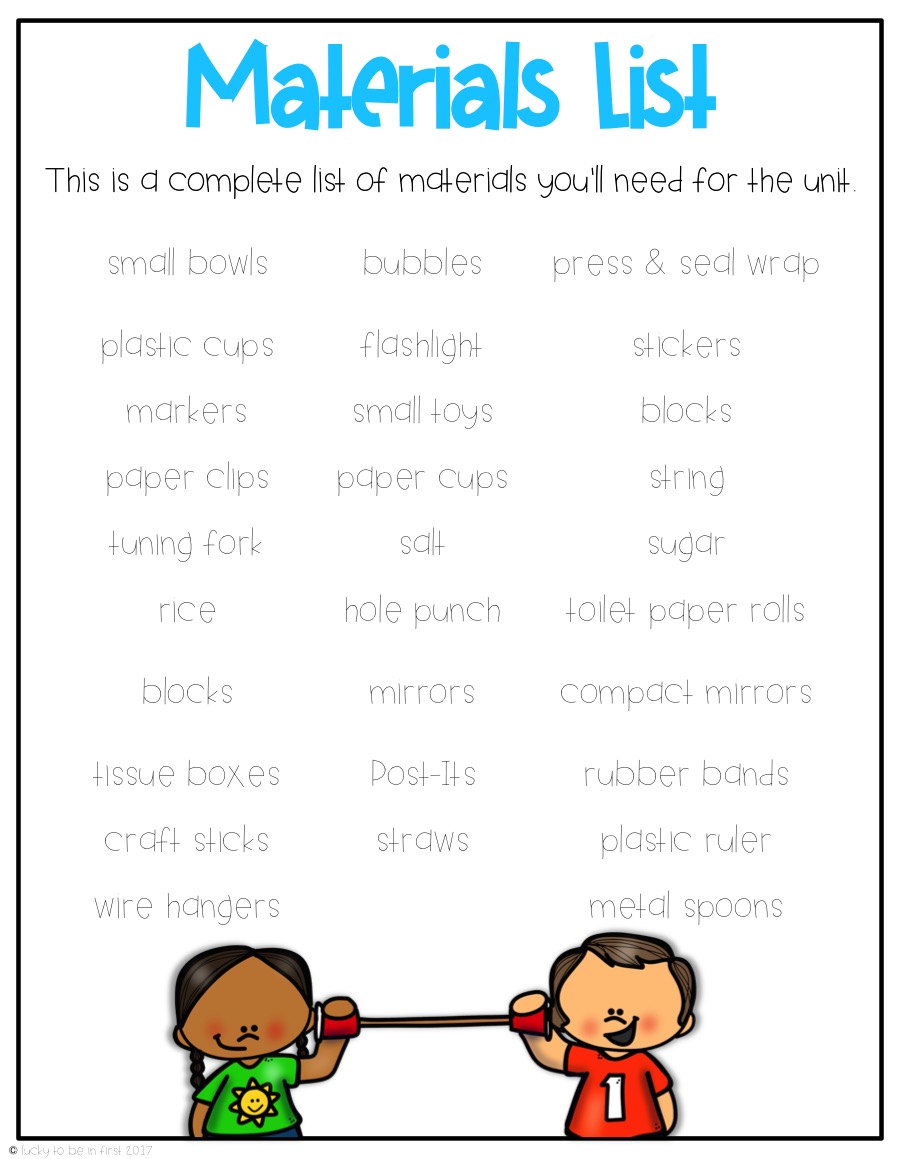
Each of the investigations uses super simple materials that you have around your classroom or can easily get from parents. I’ve included a Materials List to make gathering these goodies easy!
I’ve also included a Family Letter to inform your students’ families about what they’re learning about!
What is a Scientist? Activity
Kick off the unit by chatting about what being a scientist actually means!
Kids L•O•V•E science! Get them thinking about just what a Scientist does! It’s fun to gauge their thinking and start meaningful conversations about science. The bonus is that your students will start to see themselves as scientists!
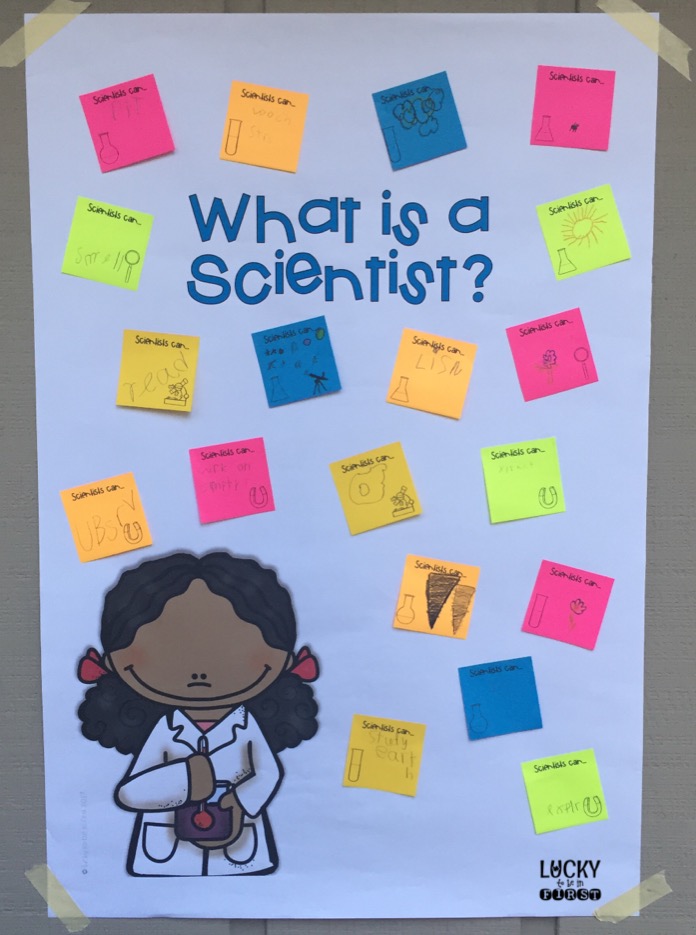
I had SO much fun doing these experiments when I was making this unit, so I am certain you will, too! The best part – your students will definitely have fun and learn about light & sound along the way!
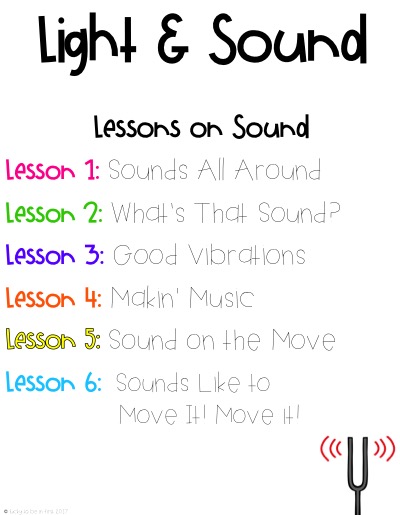
Sound Activities & Lesson Plan Ideas for 1st Grade
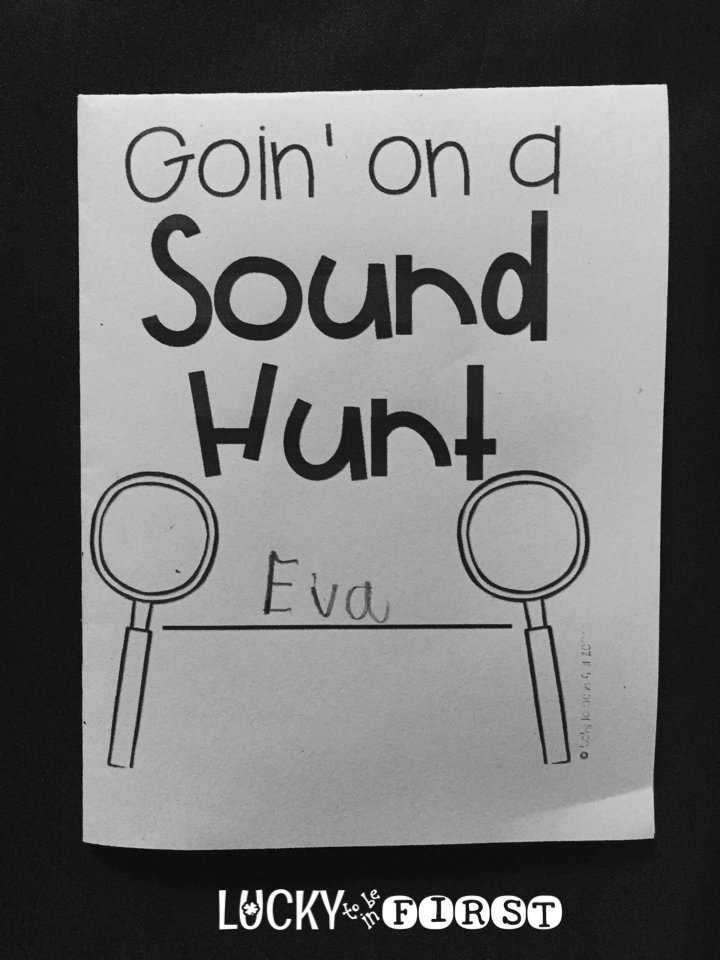
You’ll start this set of sound explorations by taking your kiddos outside for a sound hunt. Give them a while to explore and record the sounds they hear using their senses. They’ll fill out a mini book and add their sounds to a poster.
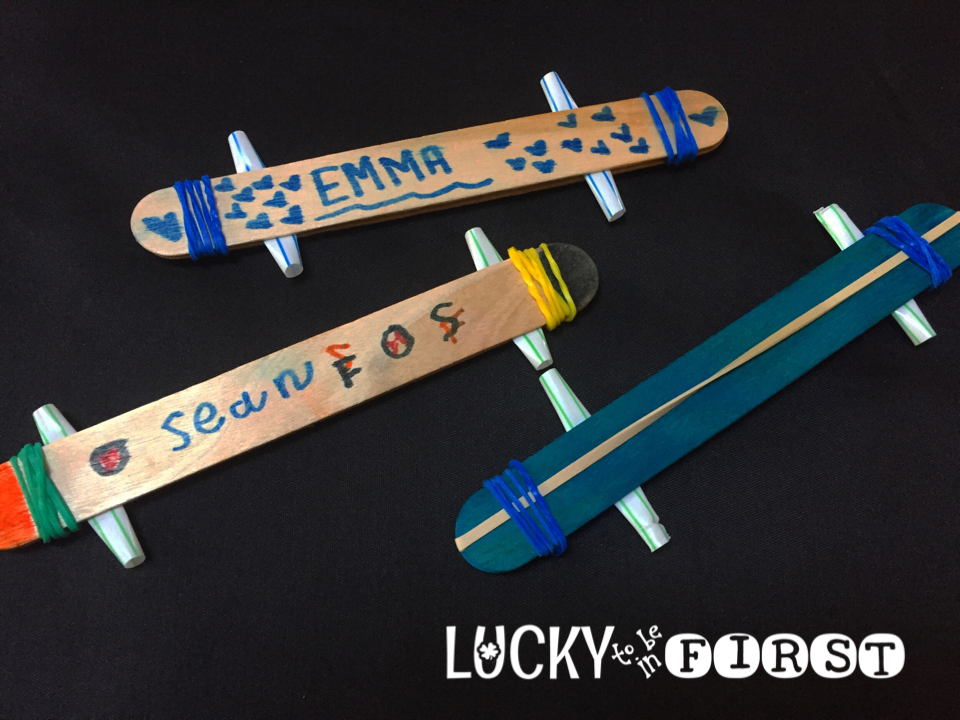
Once your students have an awareness that sound is everywhere , you’ll move into lessons to get them making sounds and understanding sound waves.
This kazoo is SURE to be a hit in that exploration!
In the following lessons, students will continue to explore how sound moves and how they can change the sound things make. Simple supplies from around your classroom will give students a chance to make their very own instruments!
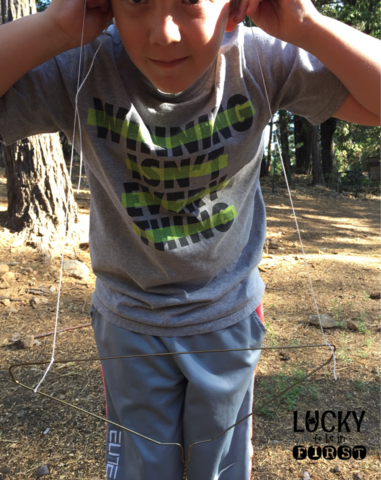
Thankfully I had this cutie to help me test out this hanger instrument! This lesson helps students see how sound moves through different materials.
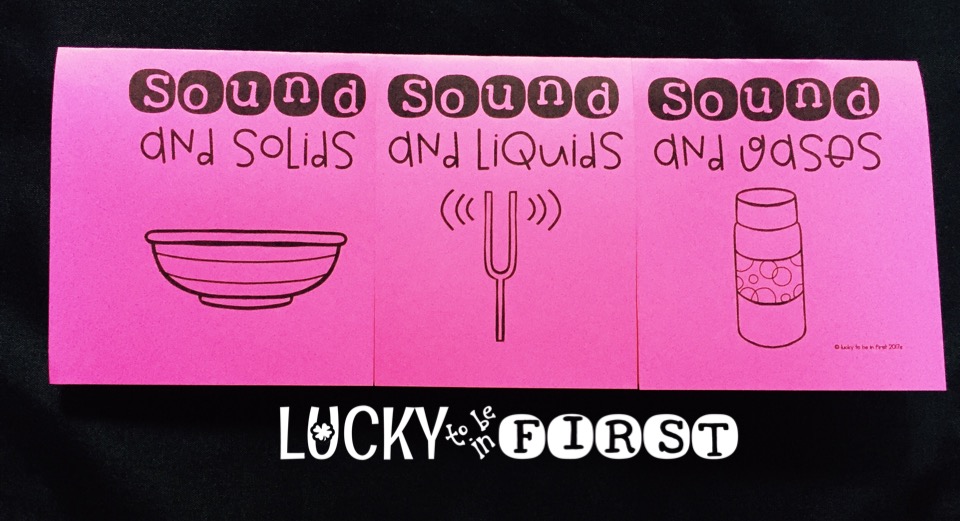
The final lesson in the sound exploration gives students a chance to see how sound moves through solids, liquids & gases.
By the end of these experiments, students will have a good understanding of sound! I’ve included book suggestions, YouTube links, and additional ways to extend the lessons!
Light Activities & Lesson Plans for 1st Grade
Here’s a peek at all the lessons for sound.
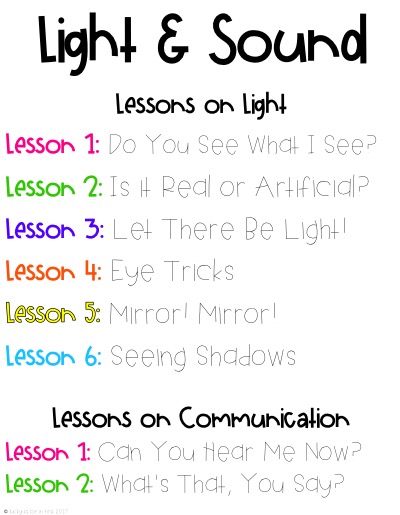
To start, your students will explore why light is needed! Without light, we can’t see anything!
Then, you’ll move into a discussion about Natural vs. Artificial light.
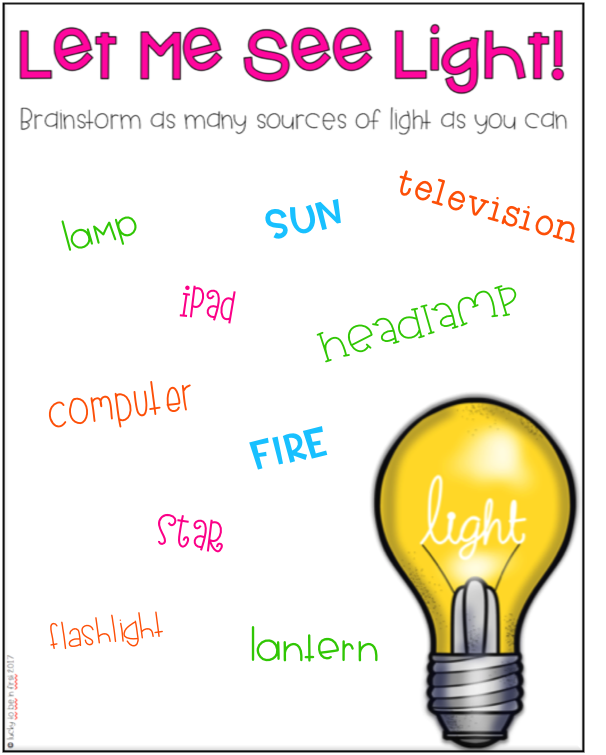
The students will follow up the discussion with this PowerPoint game. Check out a sneak peek below!
After understanding that light is necessary to see and that there are various ways to see light, you’ll move into a bit meatier ideas. In the next lesson, kids will investigate different materials to see how light reacts.
Grab some cheap flashlights from the dollar store and a few different cups and you’re all set to go!
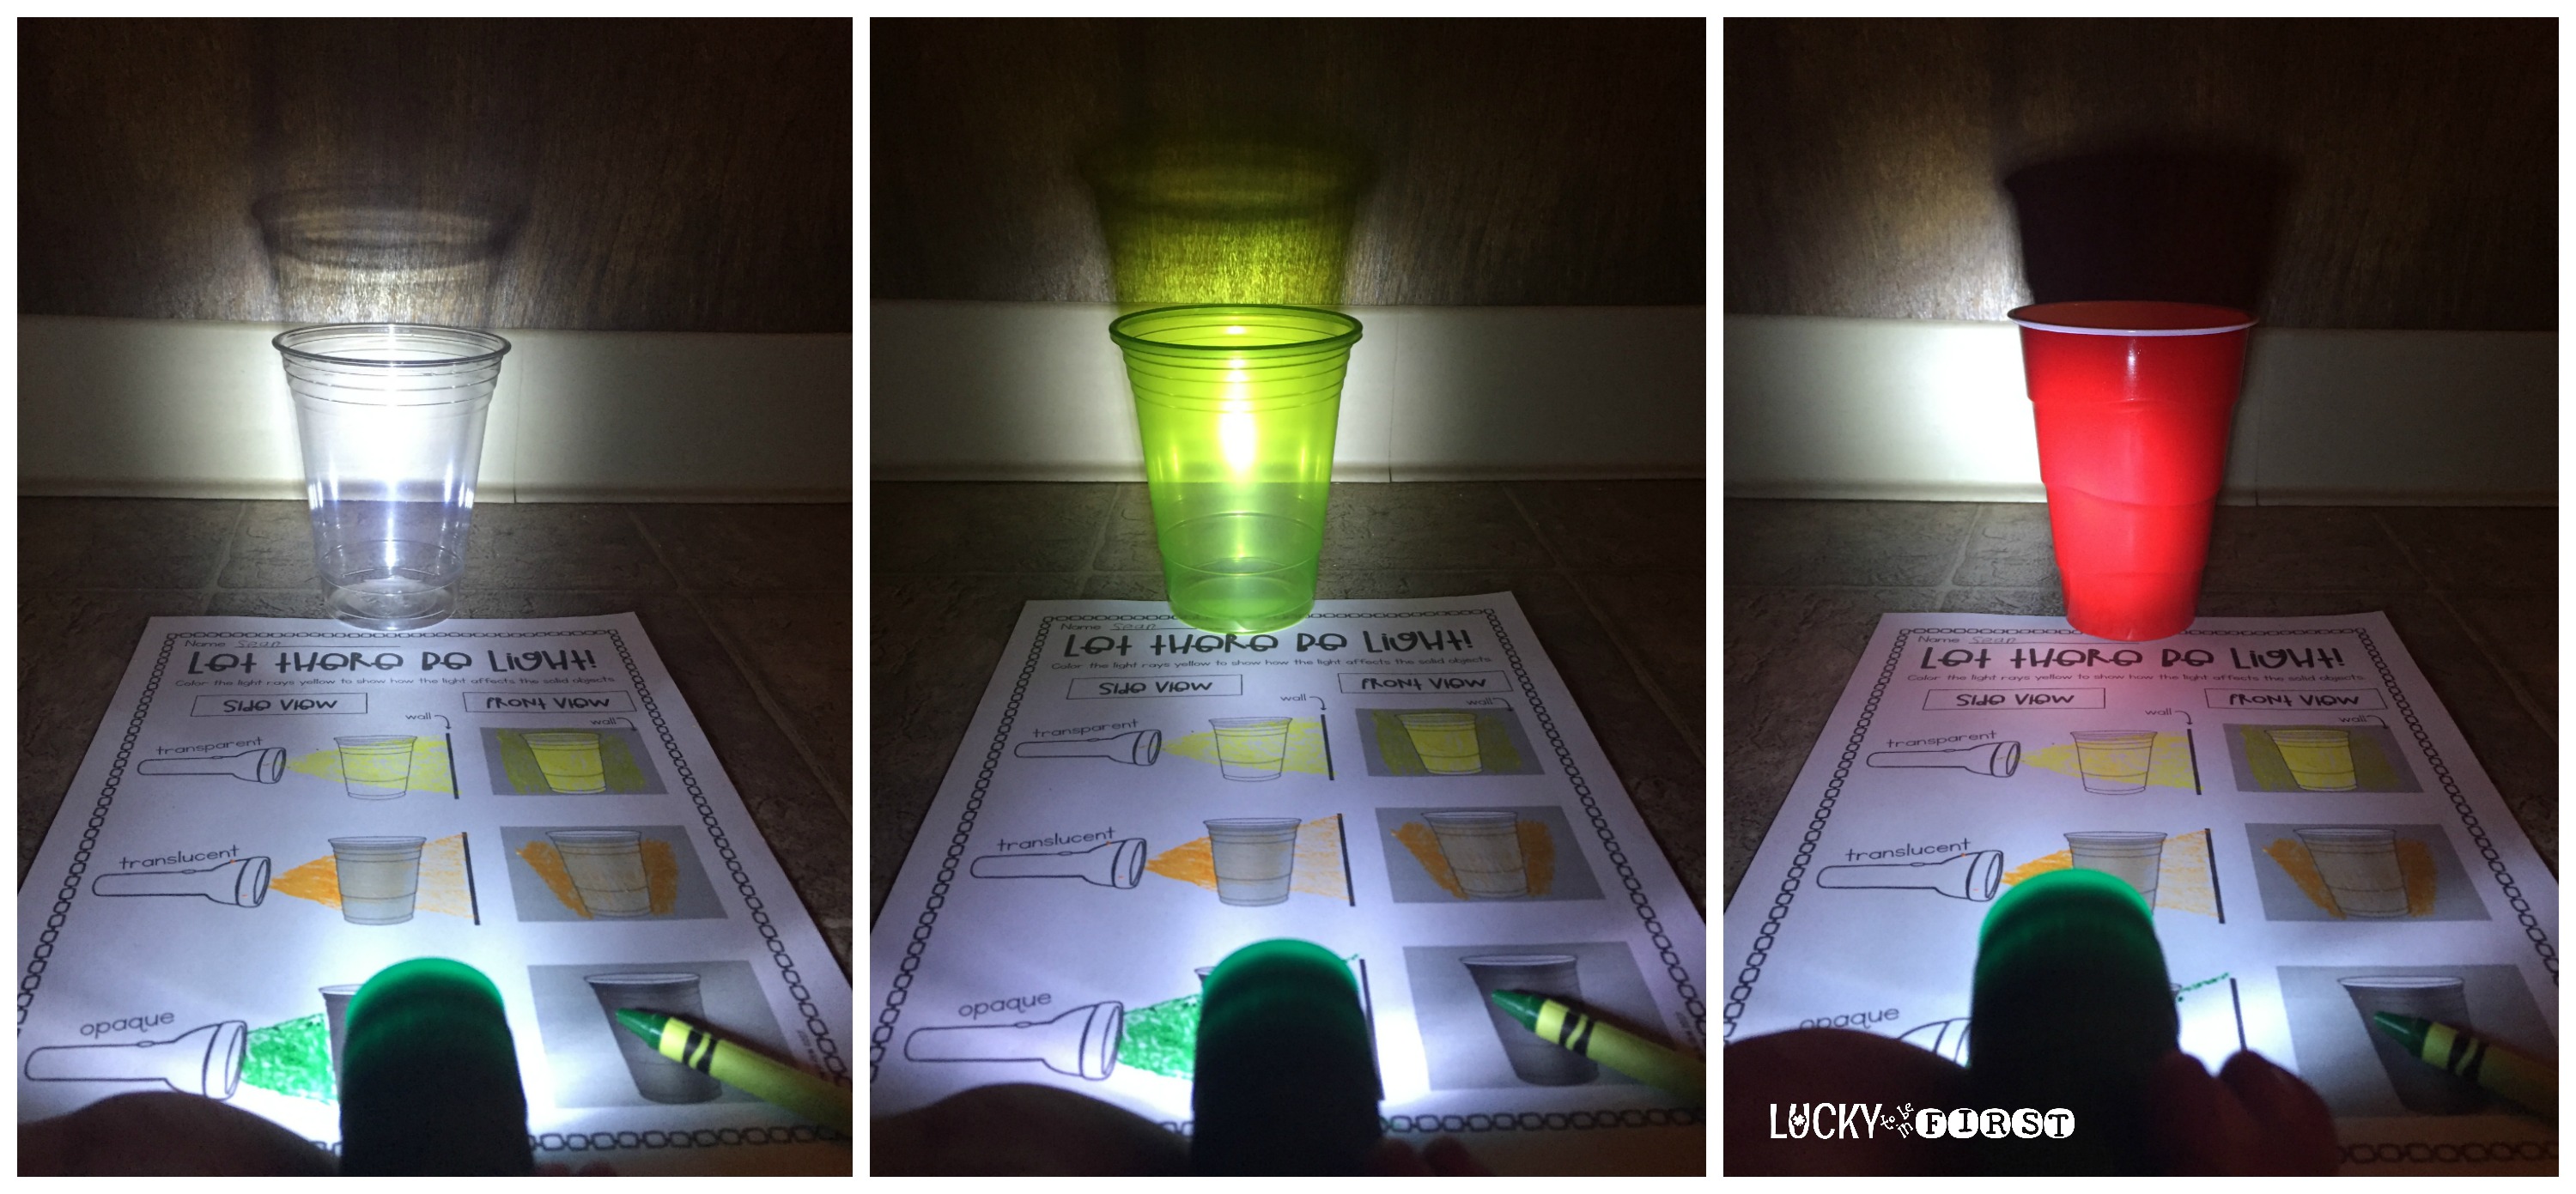
Through exploration, the students will see that light affects transparent, opaque, and translucent materials differently!
By far, my favorite lesson is #4 – Eye Tricks!
Students will do a light experiment to see just how refraction works! I bet this will be a crowd pleaser in your classroom!
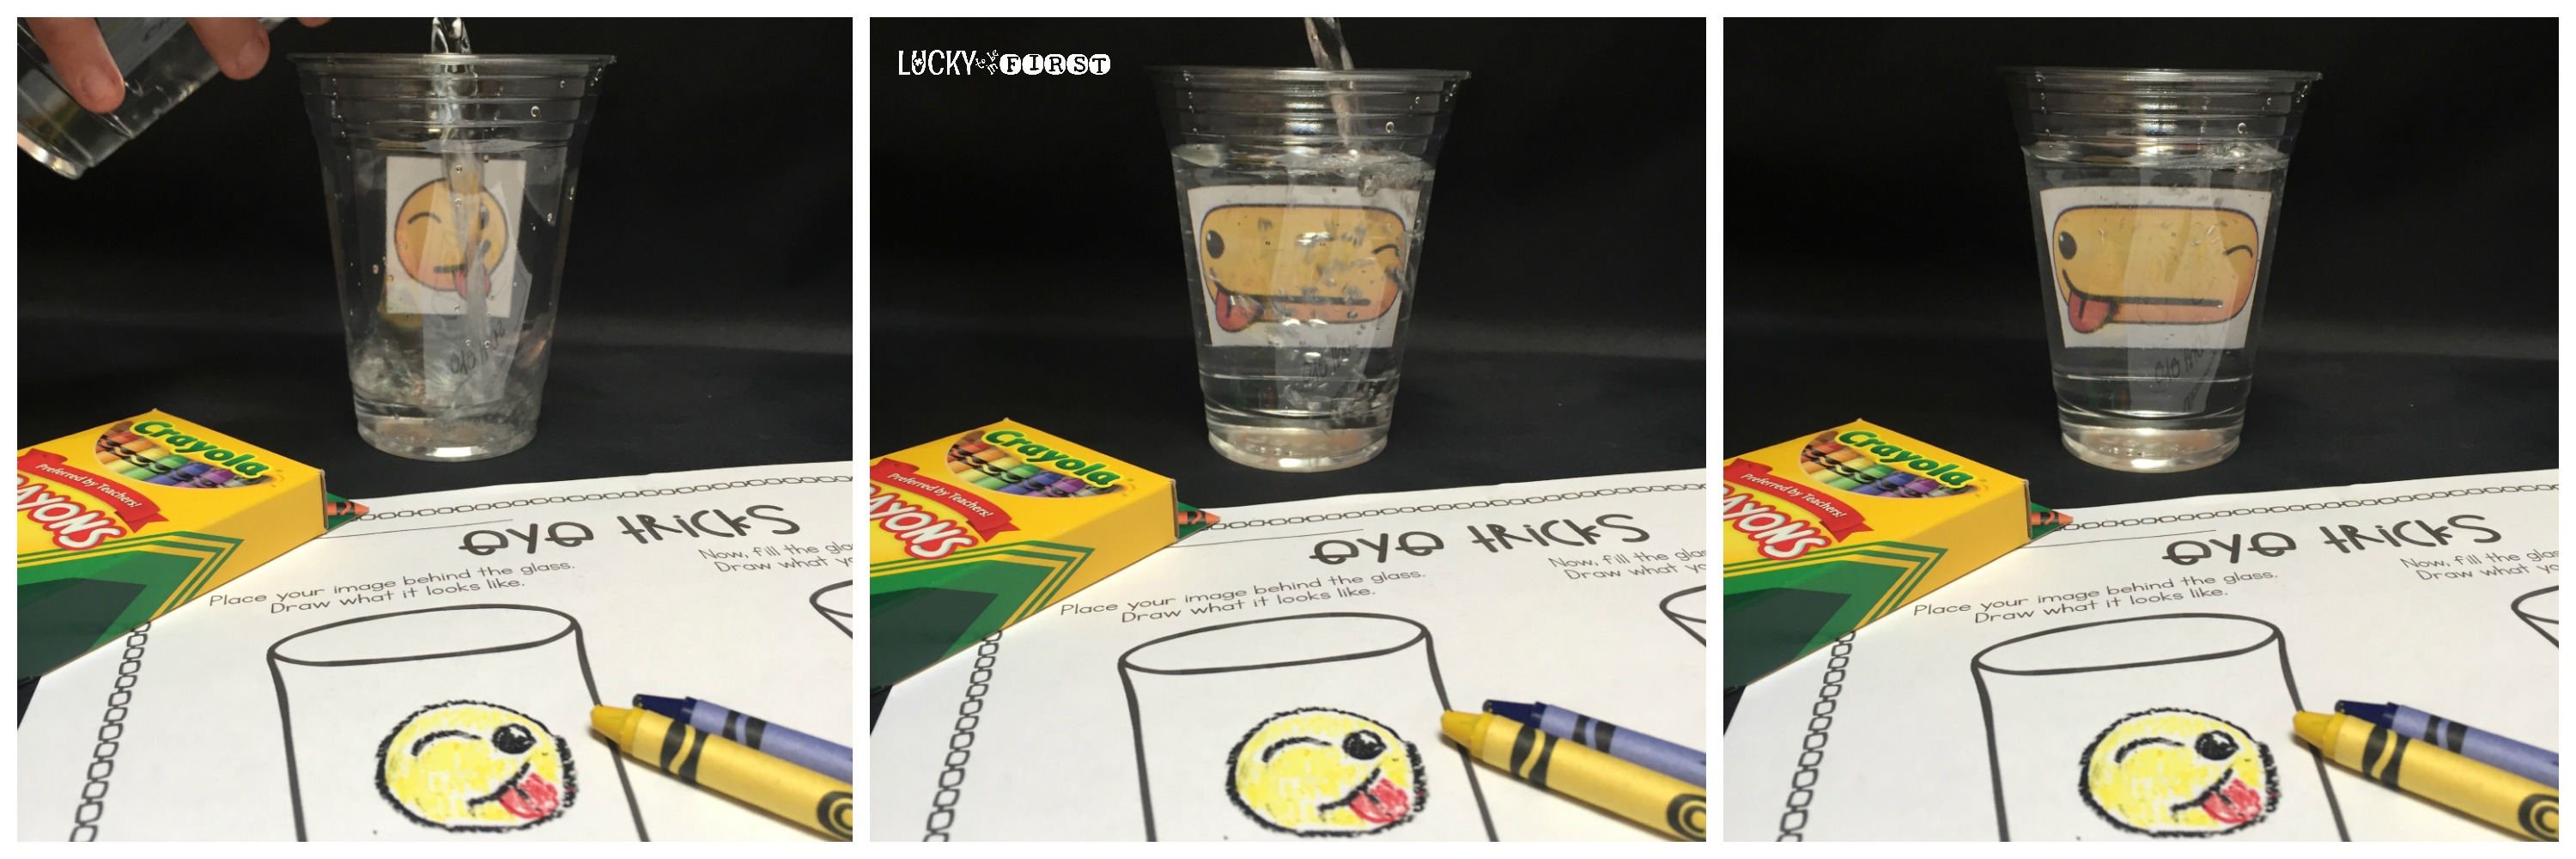
Check it out in action!
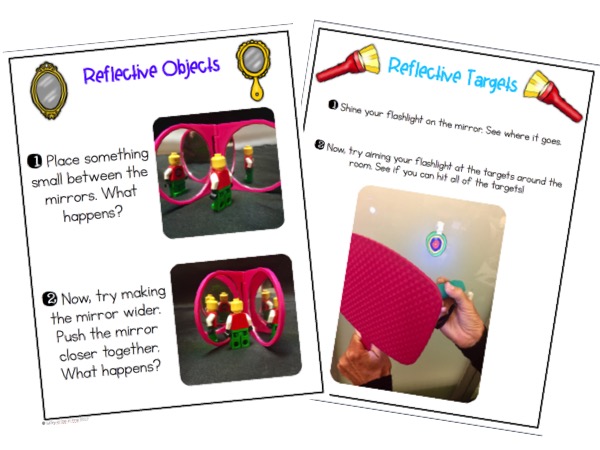
Have you ever met a kid who doesn’t love a mirror? Well, turn that fun and curiosity into some learning with these explorations.
Students will explore with mirrors, toys, and lights to see what happens with light!
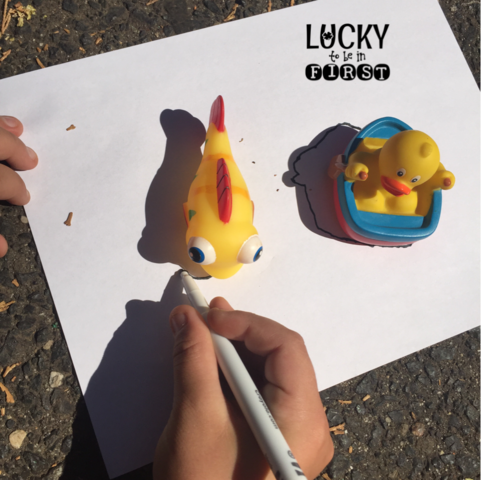
To wrap up your light study, you’ll give students a chance to head outside and explore shadows!
Lesson Ideas to Better Understand Sound & Light
To show their learning, students will wrap up the unit combining their knowledge of sound and light!
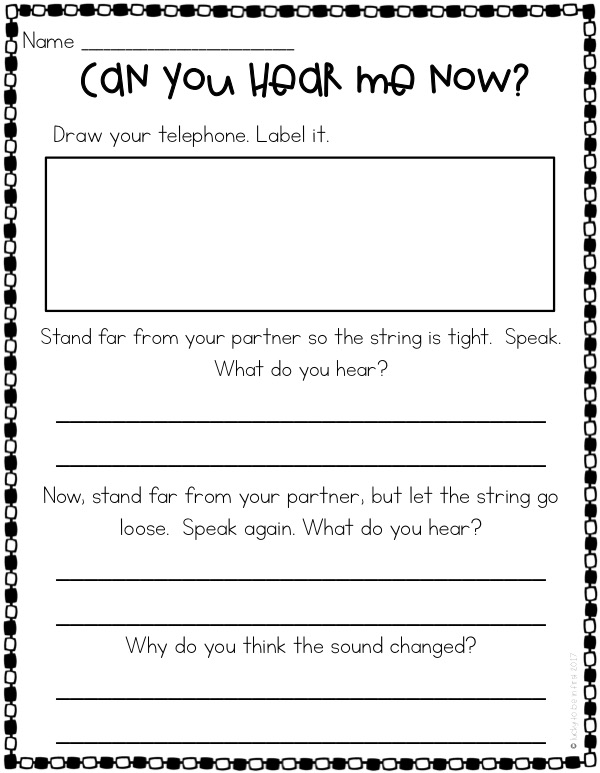
First up, they’ll create a telephone using string and cups. Don’t you remember doing this when you were a kid? Now, you can do it again…and share the science behind it!
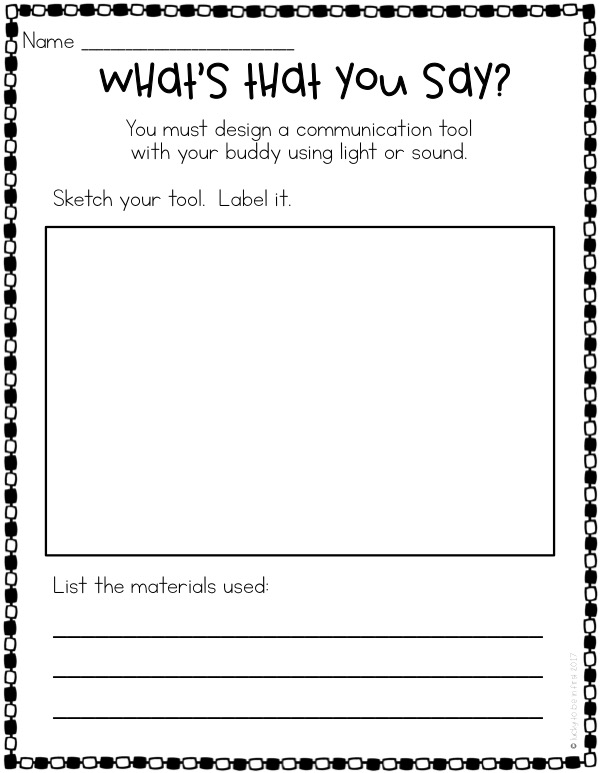
And the final project will be creating a way to communicate with a friend…without speaking! Your students are sure to get creative with this activity!
Recap of Sound & Light Activities and Lesson Plans for 1st Grade
I promise this entire Sound & Light Investigations unit is TEACHER friendly! The kids will have so much fun learning and exploring that they won’t even realize they’re learning those new Next Generation Science Standards!
Go find it in The Lucky Shop here!
Want to check out some Sound & Light books for teaching this unit? This post has my favorite light and sound books!
- Published: September 4, 2017
- Updated on: September 9, 2024
- Filed Under: Science
One Response
Hi, Thank you for the great FOSS info. We are also teaching Sound and Light for the first time. Can you share what your report card grades for this unit?
Leave a Reply Cancel reply
Your email address will not be published. Required fields are marked *
This site uses Akismet to reduce spam. Learn how your comment data is processed .
LUCKY NEWSLETTER
Join the lucky list and get freebies.

Visit My Shops
- Lucky Learning Shop
- Amazon Shop
Stay Connected
Useful links.
- Become an Ambassador
- Teacher Stamps
Sign up to get ideas sent right to your inbox!
- STEM Ambassadors
- School trusts
- ITE and governors
- Invest in schools
- Student programmes
- Benefits and impact
- Our supporters
- Advertising and sponsorship
- Become a STEM Ambassador
- Request a STEM Ambassador
- Employer information
- Training and support
- STEM Ambassadors Partners
- Working with community groups
- Search icon
- Join the STEM Community
Light waves
Light is conceptually difficult for many students and misconceptions can persist unless challenged. The resources in this list not only provide a range of activities and demonstrations, but also background information, practical tips, information on misconceptions and suggested teaching strategies.
This list links to the following topis;
• light waves travelling through a vacuum; speed of light • the transmission of light through materials: absorption, diffuse scattering and specular reflection at a surface • use of ray model to explain imaging in mirrors, the pinhole camera, the refraction of light and action of convex lens in focusing (qualitative); the human eye • colours and the different frequencies of light, white light and prisms (qualitative only); differential colour effects in absorption and diffuse reflection
Visit the secondary science webpage to access all lists: https://www.stem.org.uk/secondary-science
Whilst this list provides a source of information and ideas for experimental work, it is important to note that recommendations can date very quickly. Do NOT follow suggestions which conflict with current advice from CLEAPSS, SSERC or recent safety guides. eLibrary users are responsible for ensuring that any activity, including practical work, which they carry out is consistent with current regulations related to Health and Safety and that they carry an appropriate risk assessment. Further information is provided in our Health and Safety guidance.
Lighting Designer *suitable for home teaching*
Quality Assured Category: Design and technology Publisher: Department for Education
This Department for Education clip illustrates the major role that science, technology, engineering and mathematics subjects play in the creative industries. The video follows Will a lighting software designer who designs the lighting for concerts, plays, films, pop videos and other entertainment events. Will describes the need for a good grounding in physics and mathematics to do his job.

Light 11-14
Quality Assured Category: Physics Publisher: Institute of Physics: Supporting Physics Teaching
Here is a whole set of resources from the Institute of Physics (IOP) on the topic of light specifically designed for key stage three students. You can find the activities in the teaching approaches section. The physics narrative section and the teaching and leaning notes will be particularly appreciated by those teaching outside of their specialism.

Dispensing Optics
Quality Assured Category: Careers Publisher: Future Morph
Produced for Future Morph, this short video looks at several students following ophthalmic dispensing and contact lens courses. The students describe the work they are doing with lenses and how this relates to the science they learnt at GCSE level. It illustrates some of the career opportunities available in the eye care industry. Also included are some simple student activities, with accompanying teacher guidance, that illustrate how images are formed with lenses.
Light and Optics Teacher Resource and Class Activities
Quality Assured Category: Science Publisher: NASA
This resource provides a wealth of ideas for investigating light and colour. Ignore the fact that the levels are linked to the American school system (it was produced by NASA) because the activities are equally suited the the Key Stage Three curriculum.
Using lenses, prisms and mirrors students create telescopes, periscopes, microscopes and kaleidoscopes. Other activities include finding focal length and understanding reflection, refraction and diffraction.
The activity on pages 13-16 can be carried out as a demonstration which students will find highly amusing. For a variation of this activity, you can draw a simple maize and ask students to take it in turns to try to draw a line from the start the the finish by only looking in the mirror, but they won't be able to do it! You can use a visualiser to project their efforts onto the board.
Tyndall Effect: Red Sky at Night
Quality Assured Category: Physics Publisher: Solar Spark
This demonstration will captivate students. It helps to answer the simple, yet complex question: Why is the sky blue and the sunset red?
It's all to do with the scattering of the different colours in visible light and can be easily demonstrated using a suspension of milk in water.
The Disappearing Coin Trick
Quality Assured Category: Demonstrations Publisher: Queen Mary University of London
Great for a starter to grab students attention. Take a coin and place it under a clear, empty drinking glass. Students will be able to see the coin clearly through the glass. Then you slowly pour normal water into the glass and as it fills up, the coin vanishes.

Shadow illusion
Quality Assured Category: Science Publisher: Veritasium
These Veritasium videos are a good way to capture students' attention at the beginning of a topic and create a sense of curiosity!
Derek Muller asks members of the public to predict the outcome of his simple pinhole experiments.
Holding up pieces of card with a different shaped hole in each, the image that appears on a wall is always a circle!
You could stop the film two minutes in and challenge students to explain why this happens, leading into an experiment with pinhole cameras so that students can work out the answer using ray diagrams

The Vanishing Head aka Ghost Drink Trick
Quality Assured Category: Science Publisher: Queen Mary University of London
In this magic trick, based on Pepper's ghost, any object placed in a box becomes transparent or sometimes even vanishes. By controlling the relative amounts of light transmitted and reflected through a piece of Perspex at a 45 degree angle, objects seem to appear or vanish.
Colour mixing
Quality Assured Category: Science Publisher: Royal Institution
Such a great way to demonstrate colour light mixing. You could do the demo yourself, or show the students the film.


Do Try This at Home: the Light Collection *suitable for home teaching*
Quality Assured Category: Science Publisher: Institute of Physics
Here's a selection of ideas that students can try out for themselves at home. You could ask them to choose three to show someone in their family and then explain how it works to them.

Sound and Light
Quality Assured Category: Science Publisher: Reach Out CPD
After you've demonstrated how a sound wave travels by using a slinky, here's a very visual and captivating demonstration.
Martin Archer, from Imperial College, explores how to increase a child’s understanding of sound through a visual demonstration of a sound wave. He explains how a Rubens Tube can be used to show a sound wave by passing sound through a metal tube full of gas. The top of the tube has tiny holes along it, through which the gas escapes. When lit the flame length varies showing the compressions and rarefactions of the sound wave.
Seeing Pink Elephants
Quality Assured Category: Physics Publisher: Institute of Physics
This is a great activity to show how the eye sees colour and how the eye can be tricked into seeing the wrong colour, in this case, pink elephants.
When the human eye is exposed to one colour for a relatively long period of time, the cone cells will become saturated with that colour. Once the eye is exposed to a broad range of colours again, the brain will pick up weaker signals from that colour and an image with that colour missing will be formed.
FREE K-12 standards-aligned STEM
curriculum for educators everywhere!
Find more at TeachEngineering.org .
- TeachEngineering
- Bright Ideas: Exploring Light Reflection and Sun Safety With Micro:Bits
Hands-on Activity Bright Ideas: Exploring Light Reflection and Sun Safety With Micro: Bits
Grade Level: 4 (4-5)
(four 30-minute sessions, three 45-minute sessions, or two 60-minute sessions)
Expendable Cost/Group: US $0.00
Group Size: 3
Activity Dependency: None
Subject Areas: Computer Science, Geometry, Physical Science, Problem Solving, Science and Technology
NGSS Performance Expectations:

TE Newsletter
Engineering connection, learning objectives, materials list, worksheets and attachments, more curriculum like this, pre-req knowledge, introduction/motivation, vocabulary/definitions, troubleshooting tips, activity scaling, user comments & tips.

Optical engineers design, develop, and test optical systems and devices that manipulate light, such as lenses, lasers, fiber optics, and imaging systems. They apply principles of physics, materials science, and engineering to create innovative solutions for a variety of applications, including telecommunications, medical imaging, consumer electronics, and aerospace. Their work often involves computer simulations, prototyping, and rigorous testing to ensure the performance and reliability of optical components and systems. Additionally, optical engineers collaborate with interdisciplinary teams to integrate optical technologies into larger systems and solve complex problems related to light behavior and its interaction with materials.
After this activity, students should be able to:
- Develop a model to describe how light reflecting from objects and entering the eye allows objects to be seen.
- Use a micro:bit to simulate the process of light reflection and vision.
- Learn basic coding and how to use a micro:bit for modeling and problem solving.
Educational Standards Each TeachEngineering lesson or activity is correlated to one or more K-12 science, technology, engineering or math (STEM) educational standards. All 100,000+ K-12 STEM standards covered in TeachEngineering are collected, maintained and packaged by the Achievement Standards Network (ASN) , a project of D2L (www.achievementstandards.org). In the ASN, standards are hierarchically structured: first by source; e.g. , by state; within source by type; e.g. , science or mathematics; within type by subtype, then by grade, etc .
Ngss: next generation science standards - science, common core state standards - math.
View aligned curriculum
Do you agree with this alignment? Thanks for your feedback!
Each group needs:
- Bright Ideas Worksheet (one per student)
- 1-2 micro:bits and accessories (depending on how many you have or can buy)
- 1 micro USB cable
- 2 AAA batteries
- 1 battery holder for micro:bit
- 1 Chromebook or laptop computer
- any supplies the students come up with that they will need to solve their problem (e.g., cardboard, paper, tape, sticks, plastic cups, plastic containers, foam sheets, other household materials to test, etc.)
For the teacher to demonstrate (or for students to test on their own):
- 1 flashlight
Materials for the entire class to share (these are suggestions to make the eye model):
- cardboard or cardstock (about 2 pieces of cardstock per eye model)
- toilet paper or paper towel rolls (great for the optic nerve)
- paper (in eye colors such as blue, green, and brown, and gray shades and black for the back of the eye)
- markers for the eye color (blue, green, brown, and gray shades)
- paint for eye texture (blue, green, brown, and gray shades)
- tape and/or glue
- zip-lock bag or sheet protector (anything clear to act like a cornea)
- compass or other items to help make a circle
- any other craft supplies the students want to use to build their eye model
- (optional) building supplies or clay (to build the eye model out)
- (optional) 3X credit-card magnifier (if you want to add a “real” lens to the eye model)
Videos that support the activity:
- BrainPop Eyes - https://www.brainpop.com/health/bodysystems/eyes/movie (must have a subscription)
- Generation Genius Light Reflection and Vision https://www.generationgenius.com/videolessons/light-reflection-and-vision-video-for-kids (must have a subscription)
- Human Eye - The Dr. Binocs Show https://www.youtube.com/watch?v=axpCN6Vj9p0 (free on YouTube)
Students should have a basic understanding of how to use block coding and a micro:bit. If the students don’t have this knowledge, there are quick online mini lessons that can be taught.
(Prepare the Bright Ideas Presentation to be projected for class to view.)
Today we are going to explore how we see the world around us. Has anyone ever wondered how we can see things? What makes it possible for us to see objects, colors, and shapes? (Wait for student responses.)
(Show Bright Ideas Presentation Slide 5.)
We see things because of light. Light is a form of energy that travels in straight lines and can come from sources such as the sun, lamps, candles, and even flashlights. When light hits an object, it bounces off or reflects from the object. This is called reflection. Think of it like playing with a ball. When you throw a ball at a wall, it bounces back. Light behaves similarly when it hits objects.
Can anyone tell me what happens to the light after it reflects off an object? How do we end up seeing it? (Wait for student responses. Guide them to understand that light enters our eyes after reflecting off objects.)
After light reflects off an object, some of that light enters our eyes. Our eyes have special parts that help us see.
- The light enters through the cornea and pupil. (Show Bright Ideas Presentation Slide 6.)
- The lens focuses the light onto the retina at the back of our eyes. (Show Bright Ideas Presentation Slide 7.) (The image appears upside down because the cornea bends light as it enters the eyes, causing the image that hits the retina to be upside down.)
- The retina converts the light into signals . (Show Bright Ideas Presentation Slide 8.)
- These signals travel to our brain through the optic nerve. (Show Bright Ideas Presentation Slide 9.)
- Our brain processes these signals and creates the image we see. (Show Bright Ideas Presentation Slide 10.) (Our brain turns the image right side up when it processes the information.)
The next time you look at an object, remember that light is bouncing off it, entering your eyes, and helping you see it!
(Show Bright Ideas Presentation Slide 11.)
What happens when you shine a flashlight on different objects around the room? What happens when you shine a flashlight on a mirror? (Do this with the lights on and again with the lights off.)
Have you ever tried to see something in the dark? What did you notice? How did the lack of light affect what you could see? (Wait for student responses and turn then turn off the lights in the classroom.) Why is it harder to see in a dark room? (Turn lights back on.)
These experiences help us understand why light is so important for vision. Whether it's a streetlight helping you see at night or the sun lighting up the day, light is essential for us to see the world around us.
For this activity, we’re going to become optical engineers and explore vision and light reflection by creating a program that simulates light intensity and how our eyes perceive images. Then we’ll work in groups to identify and solve real-world problems related to sunlight and vision. Let’s get started!
Light is a form of energy that travels in waves and moves very quickly. When light hits an object, some of it bounces off, or reflects, and travels in different directions. Our eyes receive this reflected light, which helps us see objects around us. So, when you look at a book or a tree, you’re actually seeing the light that reflects off those objects and into your eyes. Without light, like when it's completely dark, we wouldn’t be able to see anything because there’s no light reflecting from the objects around us.
Our eyes are like cameras that capture light. The front part of the eye, called the cornea, focuses the light that comes in, helping us see clearly. After passing through the cornea, the light goes through the pupil, which is the dark circle in the center of the eye. The pupil gets bigger in dim light and smaller in bright light, allowing just the right amount of light to enter. Then, the light reaches the lens, which focuses it even more. Finally, the light reaches the back part of the eye, called the retina, where special cells detect light and color, turning them into electrical signals that are sent to the brain. Our brain interprets these signals, allowing us to "see" and understand what we’re looking at.
Colors play a big role in how we see different objects. When light hits an object, some colors are absorbed, and others are reflected. For example, if you see a red apple, it’s because the apple absorbs other colors of light and reflects only the red light, which our eyes detect. White objects reflect all colors of light, which is why they look white, and black objects absorb all colors, making them look dark. This process of light reflection, focusing, and color detection helps us understand the world visually, allowing us to see shapes, colors, and details of the things around us.
Key concepts:
What is light? Light is a form of energy that allows us to see. It travels in straight lines and can come from natural sources such as the sun or artificial sources such as a flashlight or a light bulb.
Reflection of light: When light hits an object, it doesn't just stop. Instead, it bounces off the object. This bouncing off is called reflection. Imagine playing with a ball: When you throw it at a wall, it bounces back. Light behaves similarly when it hits objects.
Path of light: After light reflects off an object, it travels in straight lines in many directions. Some of this reflected light enters our eyes.
How the eye works:
- Cornea and lens: The front part of your eye, the cornea, and the lens inside your eye work together to bend the light and focus it.
- Retina: The light is then focused onto the retina at the back of your eye. The retina is like a screen that captures the light.
- Optic nerve: The retina converts this light into signals that are sent to the brain through the optic nerve. Your brain processes these signals and creates the image you see.
Seeing an object:
- For example, when you look at a red apple, light from a source (like the sun or a lamp) shines on the apple.
- The light reflects off the apple, and some of this light enters your eyes.
- Your eyes focus the reflected light onto the retina, and your brain processes the signals to see the apple.
Common misconceptions to clarify before/during the activity:
Incorrect statement: Light does not travel from a source to an object.
- When an object is illuminated by a lamp or the sun, it is because light is traveling from the source to the object. The farther away from the source you are, the less illuminated an object will be.
Incorrect statement: Light does not need to enter the eye for an object to be seen.
- Light is necessary for our eyes to see objects. This is why it is impossible to see anything in a completely dark room.
Incorrect statement: The light needed to see an object is coming from the eye rather than to the eye.
- Our eyes do not produce any light. Objects must be illuminated by a source (lamp, sun, etc.) for us to be able to see them.
Incorrect statement: Only shiny objects reflect light.
- Shiny objects reflect light well, but any object you can see reflects light; otherwise, you wouldn’t be able to see it.
Incorrect statement: Black does not reflect any light.
- Black does reflect light, just less than white or lighter colors.
Incorrect statement: Light goes around things and does not travel in a straight line.
- Light travels in a straight line. You have a shadow because your body is blocking the path of some of the light from the sun. Light only goes around objects if it is reflected.
The micro:bit is a pocket-sized, programmable microcontroller designed to make learning and teaching easy and fun. It includes a grid of 25 LEDs that can display messages, two programmable buttons, an accelerometer, a magnetometer, and a Bluetooth antenna. The micro:bit can be programmed using coding languages such Python and JavaScript and platforms such as MakeCode.
Before the Activity
- Review the activity to familiarize yourself with the objectives, materials needed, and procedure steps.
- Gather materials by collecting all the necessary materials listed in the activity plan, including craft supplies for the eye model and the micro:bits for the simulations and real-world problems to be solved.
- Make copies of the Bright Ideas Worksheet . (one per student)
- Prepare the classroom by ensuring that all materials are organized and easily accessible. It might be good to use tables or put desks together to form groups.
- Consider how you will determine which students will be in a group. Don’t forget to consider factors such as student dynamics and participation.
- If you are unfamiliar with micro:bits, it is recommended that you complete a professional development course such as this one .
During the Activity
Part 1 (30-60 minutes)
- Gather students together and introduce the day’s activities by reading the Introduction and Motivation section. (5 minutes)
- Pass out mirrors; if you don’t have enough for each student, have the students work in pairs or groups.
- Tell students they are to look in the mirror and ask the following: (Show Bright Ideas Presentation Slide 12.) (5-10 minutes)
- “What do you see?” (Answer: Themselves)
- “Why?” (Answer: Their sense of vision [eyes and brain] is working with light to be able to see the image of themselves.)
- “How can the mirror show you yourself?” (Answer: The shiny smooth surface of the mirror reflects light, and we see an image.)
- Give each student a Bright Ideas Worksheet .
- Have students draw a diagram that shows how our eyes see our reflections in a mirror in their Bright Ideas Worksheet .
- After students write down their answers, discuss their responses as a class. (Answer: Light reflected off the image enters the eyeball through the front lens. Because light travels in straight lines, it crosses at the lens, inverting the image at the back of our eye. Our brain automatically turns the image right side up!)
- (optional) Show videos to help build background knowledge (Note: You can watch all, some, or none of the videos below; however, two of videos require a paid subscription. You can also show the videos at any time during the activity.)
- BrainPop Eyes- https://www.brainpop.com/health/bodysystems/eyes/movie (must have a subscription) (4 minutes)
- Generation Genius Light Reflection and Vision https://www.generationgenius.com/videolessons/light-reflection-and-vision-video-for-kids (must have a subscription) (10 minutes)
- Human Eye- The Dr. Binocs Show https://www.youtube.com/watch?v=axpCN6Vj9p0 (free on YouTube) (5 minutes)
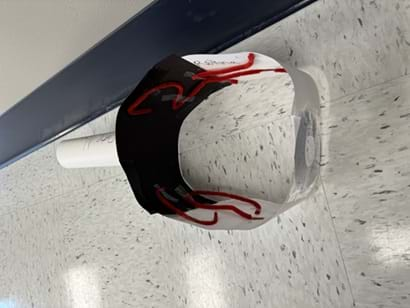
- Have students build an eye model as directed in Bright Ideas Presentation Slide 13.
- Using craft supplies, have students build a model of the eye and then label the different parts.
- This eye model needs to be a side model so students can see the back or put a micro:bit in the back.
- Models can be created by each student or with a partner or group.
- As the students get ready to build, make the following suggestions:
- Outside of the eye: cardboard or cardstock (about 2 pieces per eye model)
- Optic nerve: toilet paper or paper towel rolls
- Iris eye colors (paper in blue, green, brown, and gray shades; markers or crayons for the eye color, paint to add texture)
- Retina and pupil: black paper or black markers/crayons for the back of the eye
- Cornea: clear zip-lock bag or sheet protector
- Give students time to create their model. Note: This may take an extra day or two, depending on how detailed you want your students to be and how much time you have each day.
Part 2 (30 minutes + 30 minutes if students need extra time learning about micro:bits.)
- This step only needs to be done if it’s your students’ first time using micro:bits. If your students are familiar with micro:bits, skip to Step 2.
- Provide each group with a micro:bit (depending on how many micro:bits you have). If you only have 1-2 for the whole class, then you can skip to the coding part.
- Have the students go to https://makecode.microbit.org to start their first coding project. There are six introductory projects that help your students learn the different features of the micro:bit. It is recommended that they do all six; they don’t take very long. If you don’t have the time, you can pick which ones you want them to do.
- Once you have coded a project, you will need to download the code to the micro:bit by connecting the micro:bit to the computer with the cable and then clicking the ‘download’ button in MakeCode. If you only have a few micro:bits, have the students take turns trying to download code to the micro:bit.
- MakeCode makes it easier to start off with and create code quickly. If your students are familiar with code, or a couple of students are, you are welcome to let them use Python to do text-based programming.
- Coding the micro:bit
- Show students how to create a program that simulates light reflection using the LED display on the micro:bit. This can be done two ways.
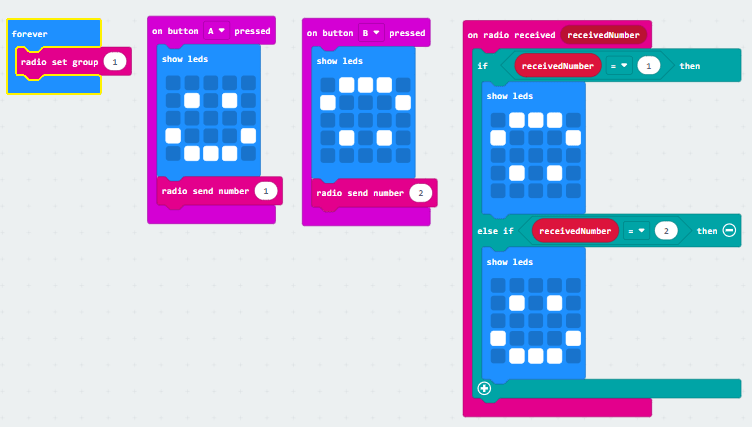
- You may also choose to have the students create a program that simulates light intensity. This can represent how the pupil changes sizes depending on how much light it is receiving. If you want to just demonstrate this as the teacher, that is also an option. (20-30 minutes)
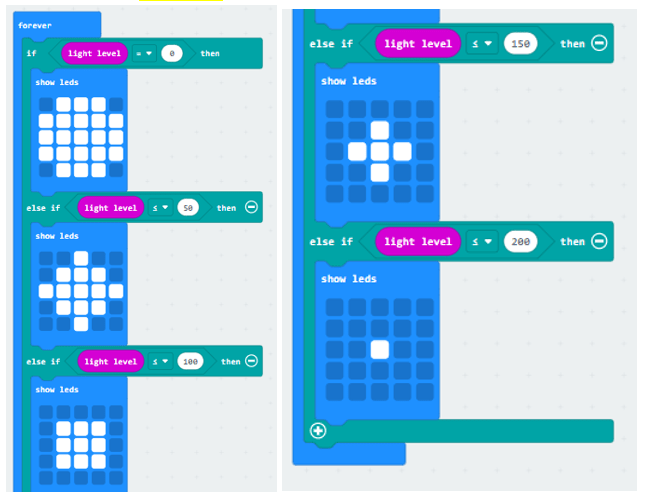
- For these coding projects you can set it up several different ways.
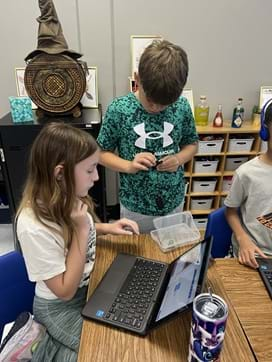
- Each student creates their own code. (You don’t have to have a micro:bit for each student in order to do this, because the coding program is free.)
- Pair programming, where students code with partners. They should swap roles frequently.
- Driver - creating the code on the computer
- Navigator - guiding, keeping the project on track, and suggesting ideas for improvement
- Discussion and Reflection (5 minutes)
- Discuss how the micro:bit helped model the process of light reflection and vision.
- On the worksheet or in their science notebooks, ask students to explain in their own words how light reflection allows us to see objects.
- Talk with students about how engineers create models and simulations to analyze existing systems so they can see where flaws might occur and to test possible solutions to new problems. They also use them to recognize the strengths and limitations of their designs. Make sure to emphasize that models and simulations help us develop explanations about natural phenomena; they also make it possible to go beyond observables and imagine a world not yet seen.
Part 3 (60 minutes)
- (optional) Review the engineering design process .
- Give each student an Engineering Design Process Worksheet .
- Separate the class into groups of 3-4 students.
- Present the challenge: Solve a problem that deals with sunlight/light and/or vision. Here are some example problems you can give them if they are struggling to come up with their own:
- Developing a system that displays the current sunlight intensity (if you didn’t have them do this before, or show in the teacher demo).
- Creating a reminder for someone to put on sunglasses or sunscreen.
- Developing a system or test to determine what materials block light/UV rays.
- Detecting UV rays and alerting someone when they are exposed to harmful levels.
- Inventing a pair of “smart sunglasses” that can adjust their tint based on sunlight intensity.
- Designing a device that can monitor light pollution levels in different environments.
- Ask: Have students fill out the “Ask” section of their Engineering Design Process Worksheet . This is where they will write down what problem they will solve and list their criteria and constraints.
- Research, Imagine, Plan: Have students fill out the “Research,” “Imagine,” and “Plan” sections of their Engineering Design Process Workshee t.
- Create: Provide students with the necessary materials to build their design. (Note: You can let students use any materials that they might need to build their design. If you don’t want them to build the actual prototype, you can at least have them code the micro:bit and design a drawing of the prototype.)
- Improve: After they test their designs, have them answer the questions in the “Test” and “Improve” sections of the Engineering Design Process Worksheet.
- Reflect: Have students answer the “Reflection” questions in the Engineering Design Process Worksheet to conclude their design challenge.
cornea: The clear layer in front of the eye.
iris: The colored part of the eye that is shaped like a donut.
light: Comes from sources like the sun, light bulbs, and candles. It bounces off things and allows us to see.
light reflection: When light bounces off the surface of an object.
light source: The place where light originates.
pupil: The dark opening in the center of the eye.
reflecting surface: Surface from which the light bounces off.
retina: The back of the eye that senses light and sends messages to the brain.
vision: The ability to see, using our eyes, which detect light that is reflected into them.
Pre-Activity Assessment
Have a discussion that includes the following questions:
- Where does light come from? (Answer: Sun, light bulbs, lamps, candles)
- Is light necessary for us to see objects? Why or why not? (Answer: Yes, for our eyes to see objects, light must reflect off the objects and enter our eyes. Without light, we cannot see.)
- How does light travel from place to place? (Answer: Light travels in straight lines and is reflected off things, bounces off them.)
Activity Embedded (Formative) Assessment
Observe students during the hands-on activity to ensure they understand the process of light reflection and vision. Check their code for understanding basic programming concepts. Check that the students are correctly identifying and labeling the parts of their eye model. Check in with each group to make sure they are making progress and understanding.
Post-Activity (Summative) Assessment
Sample questions to discuss as a class or have students write down the answers to.
- What is the main reason we are able to see objects? (Answer: Light reflects off objects and enters our eyes.)
- What happens when light hits a smooth, shiny surface like a mirror? (Answer: The light reflects in one direction.)
- Why can’t we see anything in a completely dark room? (Answer: There is no light to reflect off objects.)
- What is the term for the bouncing back of light from a surface? (Answer: Reflection)
- What did you learn about light and vision during the activity?
- What challenges did you encounter, and how did you overcome them?
- How can the knowledge you gained be applied to a real-world problem?
Safety Issues
The only safety measure that needs to be considered is making sure students are using the scissors correctly and safely.
Common snags that you might encounter while conducting the activity would be connecting and coding the micro:bit. The micro:bit was designed for students to use, so it is durable, but they still need to be careful when plugging it in to download the code to it.
For lower grades, you can increase the amount of time given to create and complete their eye model and design challenge. Also, instead of having students figure out the micro:bit code on their own, you can give them the code to use.
For older grades or advanced students, you can give them a “budget” for the challenge. You can also let them use whatever supplies they want to make their eye model have more details. They can also try to code new and different things with the micro:bit.

Students learn about the science and math that explain light behavior, which engineers have exploited to create sunglasses. They examine tinted and polarized lenses, learn about light polarization, transmission, reflection, intensity, attenuation, and how different mediums reduce the intensities of ...
“Light Reflection & Vision.” Generation Genius , 15 Mar. 2024, www.generationgenius.com/videolessons/light-reflection-and-vision-video-for-kids.
“Read ‘A Framework for K-12 Science Education: Practices, Crosscutting Concepts, and Core Ideas’ at Nap.Edu.” 3 Dimension 1: Scientific and Engineering Practices | A Framework for K-12 Science Education: Practices, Crosscutting Concepts, and Core Ideas | The National Academies Press, http://nap.nationalacademies.org/read/13165/chapter/7. Accessed 10 July 2024.
Contributors
Supporting program, acknowledgements.
This work is based on work supported in part by the National Science Foundation under grant no. EEC-1801666—Research Experiences for Teachers at the University of Missouri. Any opinions, findings and conclusions or recommendations expressed in this material are those of the authors and do not necessarily reflect the views of the National Science Foundation.
Last modified: November 13, 2024
- Login | Register
Have 10% off on us on your first purchase - Use code NOW10
Free shipping for orders over $100
Available for dispatch within 2 days
Free gift with purchase of over $100
Check out with Paypal and Afterpay
- Light & Sound Experiments
- Free Resources
- 150 Science Experiments
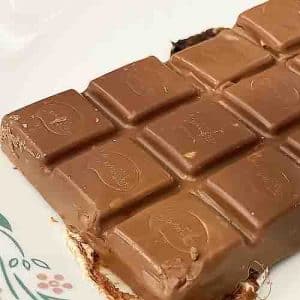
Measure the speed of light with chocolate
Ever tried measuring speed of light using chocolate? It's possible! A fun science activity that you get to eat :)
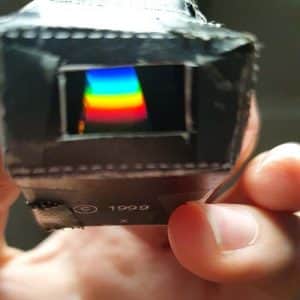
Make your own Spectrometer
Learn how to make your own homemade spectrometer using simple materials. Use light to analyse substances!
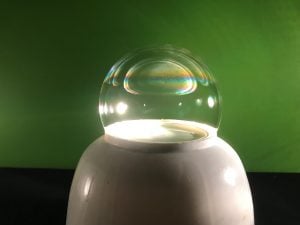
Bubble Rainbow Rings
Discover why rainbows in abubble actually happen
Its all about interference!
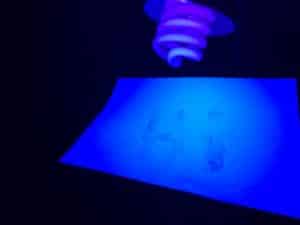
Secret Glow in the Dark Message
Glowing science for home
How does glowing work?
Create a simple lens
Spread light out
Simple lens experiment
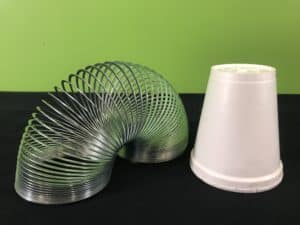
Star Wars Slinky Sounds!
An awesome sound effect!
Classic vibrations
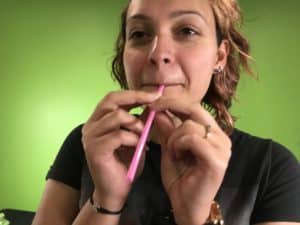
Make a straw flute
Investigate vibrations
So much fun to do!
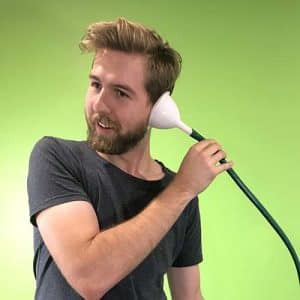
Underwater telephone
Amplify underwater sounds
So easy to do!
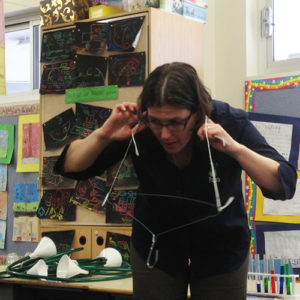
Coathanger gong
Surprisingly "loud" experiment
Sound transfer demonstration
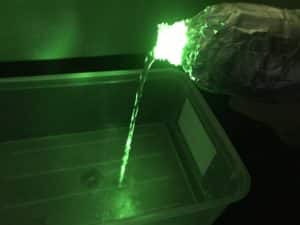
Lovely light beam experiment
Pour light out of a bottle
Demonstrates how optic fibre works
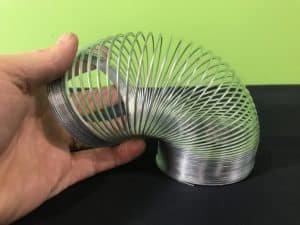
Slinky shake experiment
Learn how waves form
Understand sound & light
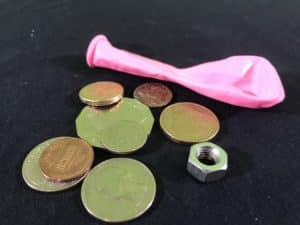
Balloon and nut hummer
Faster = higher pitch
Primary science experiment

Red car goes black?
No red light, no work!
Learn light fundamentals
Create Glowing Messages
Learn about fluorescence
Quick to put together!
Love Science? Subscribe!
Receive more lesson plans and fun science ideas.
SCIENCE PARTIES
Calendar of events.
HIGH SCHOOL Science@Home 4-Week Membership 12PM: March 2024
Price: $50 - $900
PRIMARY Science@Home 4-Week Membership 2PM: March 2024
Light and Colour Online Workshop, Jan 18 PM
Light and colour online workshop, jan 18 am.
Lego Robotics, Sydney Olympic Park Jan 2024
Creative Coding, Sydney Olympic Park Jan 2024
Creative Coding, Sydney Olympic Park July 11 2023
Price: $100
Fizzics Education STEAM Day: Robots vs Dinosaurs, Lalor, Apr 14
Price: $45 - $50
Creative Coding, Sydney Olympic Park April 14 2023
Science@home after school 4-week membership: march 2023.
Price: $40 - $1200
Featured Experiment
Free experiment by type.
- Water science activities
- STEM Projects & Activities
- Weather & Air activities
- Road Safety Science
- Kitchen Chemistry Experiments
- Force & Movement Experiments
- Electricity & Magnetism Experiments
- Heat Experiments
- Biology & Environmental Science Projects
- Geology Rocks!
- Polar Science
- Human Body Science
- Botany Experiments
- Space Science Projects
- Digging Dinosaurs
- Mathematics
- Useful Science Websites
- Science Qoutes and Saying
School Comments View All
Fizzics Education curated a thoughtful and hands-on experience for the children, incorporating practical, skill-based learning activities and followed by a science presentation at the end of the event involving liquid nitrogen. This was delivered safely and effectively, capturing both the children and the parents for the duration of the presentation.
Fizzics Education ran a show today at our school and it was wonderful. He was a great facilitator and the show was age appropriate and well done.
I just wanted to pass on how much the staff and students really enjoyed it and how perfect it was to launch our science week activities. The students were enthralled, educated and entertained – a perfect trifecta!
Thanks so much for presenting at our school on Monday. Our students enjoyed the show.
Fizzics Education Awards
Free Chemistry Book! Sign-up to our newsletter and receive a free book!
Female Accountant Apply Here
Physics teacher apply here, science teacher apply here, view all vacancies, join our team apply here.
Send us an Email at [email protected]
Phone Number: 1300 856 828
Email: [email protected], address: unit 10/55 fourth ave blacktown, nsw 2148, australia.
- Privacy & Legal Policy
- Copyright Notice
- Terms of Trade
- Cookie Policy
Copyright 2024 Fizzics Education . All rights reserved.
This website uses cookies to improve user experience. By using our website you consent to all cookies in accordance with our Cookie Policy .
Get more science with our newsletter!
Thank you for looking to subscribing to our newsletter 🙂 Through this service you’ll be first to know about the newest free experiments, science news and special offers.
PLUS: Get a free Kitchen Chemistry Booklet with >20 experiments, how to use variables plus a handy template!
Click the image to preview
Please select an ebook!
Kids Edition
Parent Edition
Teacher Edition
Please fill out the details below and an email will be sent to you. Once you get that just click on the link to confirm your subscription and you're all done!
First Name *
Last Name *
Email Address *
Phone Number
Subscribe as a Teacher?
Preschool Teacher
Primary Teacher
High School Teacher
Vacation Care or Library
Subscribe as a Parent?
Enquiry Form
Extra things, products that might interest you.
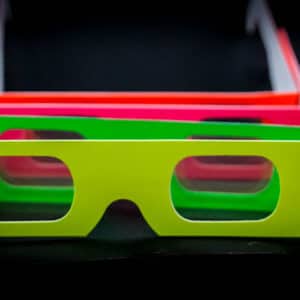
Rainbow Fireworks Glasses
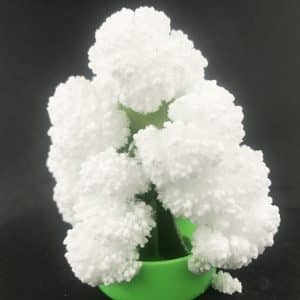
Magic Crystal Tree Science Kit
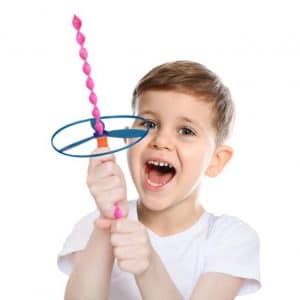
Helicopter Spiral Top

Fly Back Glider
- Grade Level
Where are you located?
- New South Wales
- Australian Capital Territory
Location not listed?
Which grade level are you teaching.
- Whole School
- Teacher Professional Development
- Special School Events
- Early Childhood
- Kindergarten
Which broad syllabus outcome you want to teach?
What is the age range of the attendee?
- Age 5 and up
- Age 6 and up
- Age 7 and up
- Age 8 and up
- Age 9 and up
- Age 10 and up
- Age 11 and up
- Age 12 and up
General Enquiry Form
Check if you require a live online class.
Subscribe for special offers & receive free resources?
How did you hear about us?
Choose a program *
Choose from school show *
* Please select a value!
* Please add a value!
Date required *
Time required *

COMMENTS
The free STEM projects, experiments, lessons and activities below help educators teach K-12 students about the physics of light, specifically, visible light, with hands-on exploration and active learning. The resources below have been grouped by grade band to help educators select the experiments and lessons that best fit their needs.
3. Light Refraction. Cool Light Refraction Science Experiment. Watch on. By engaging in these experiments, students will not only witness the mesmerizing effects of light refraction but also gain a deeper understanding of the scientific principles behind it. 4. Newton's Light Spectrum Experiment.
Hold a water hose and adjust the pressure nozzle for a fine mist spray. Spray a large mist against a dark background, like a hedge or tree trunk. You will see all the colors of the spectrum through the mist, beginning with red and ending with indigo and violet. This experiment demonstrates how light waves bend and slow down as they travel ...
This unit is chock-full of step-by-step lessons, experiments, anchor charts, book suggestions, YouTube videos, response sheets and more to make sure your students understand Sound & Light through hands-on experiments and investigations. Each lesson includes a learning target, background information, talking points, a book suggestion, and.
Build Your DIY Spectroscope from Buggy & Buddy. Kids will LOVE to make their DIY spectroscope! The best part of this science activity is that it can be done with a few simple materials and explore the spectrum of different light sources. The author offers a step-by-step, easy-to-follow approach, which is always helpful!
Light waves . Light is conceptually difficult for many students and misconceptions can persist unless challenged. ... Derek Muller asks members of the public to predict the outcome of his simple pinhole experiments. Holding up pieces of card with a different shaped hole in each, the image that appears on a wall is always a circle! ...
Students engage in a hands-on exploration of vision and light reflection by creating a program that simulates light intensity and how our eyes perceive images using the LED display on the micro: bits and its radio feature. After creating a model of an eye, students simulate the light intensity and reflection processes before they work in groups to identify and solve real-world problems related ...
The black bands between the blobs of light show that a wave is associated with the light. The light waves that go through the slit spread out, overlap, and add together, producing the diffraction pattern you see. Where the crest of one wave overlaps with the crest of another wave, the two waves combine to make a bigger wave, and you see a ...
Light & sound experiments are easy to setup & are awesome for kids! Find science activities chosen by educators that teach how light & sound really work. ... Learn how waves form. Understand sound & light. Read More Video Image Balloon and nut hummer. Comments 6. Faster = higher pitch. Primary science experiment. Read More Image ...
When the trough of one wave overlaps with the crest of another wave, the waves cancel each other out and you see a dark band. The appearance of dark bands when two light sources strike a screen shows that light is a wave phenomenon. This experiment was first performed in 1801 by Thomas Young, and it provided support for a wave theory of light.