

Rubber Band Regatta: Build a working paddle-wheel boat!

Have you or your child ever seen a paddle boat up close? We’ve only seen the giant boat at Disney World’s Magic Kingdom, but it was really interesting!
The Paddle Boat STEM experiment demonstrates propulsion to kids by building a propeller that spins in the water, pushing the boat forward. It also demonstrates potential and kinetic energy, as you build up the paddles and let them go in the water .
Time to put on your captain’s hat and head to the sea!

How to make the Rubber Band Paddle Boat experiment
Supplies you will need.
For this experiment, you’ll need:
- Empty water bottle (leave the cap on!)

Before you start
Have something handy to test your boat out, like a small pool of water in the backyard or filling your bathtub up.
Instructions
Here is how to do this experiment with your child:
Step 1: Hot glue two sets of popsicle sticks
Using your hot glue gun, glue two sets of popsicle sticks and be sure they are about the same length.

Step 2: Tape sticks to the side of the empty water bottle
Add the popsicle sticks to the side of the empty water bottle with a piece of duct tape.
Ensure the popsicle sticks are at about the same position on the water bottle and directly across from one another.
This next part is optional: you can add two cross beams to the popsicle sticks so they have a little more support and the sticks do not get too close to each other. One thing to keep in mind is, if you add these sticks, it will weigh down your boat a little.

Step 3: Cut spoons and glue
Cut the two plastic spoons about an inch down the stem from the spoon portion.
Using your hot glue gun, glue the handle of each spoon and stick them together. You will want one spoon facing up and the other spoon facing down.

Step 4: Place rubber band and spoon
At the end of the popsicle sticks, place the rubber band around the sticks so it’s perpendicular to the sticks.
Place the spoon in the middle of the rubber band and begin to wind the spoons in the opposite direction you want them to spin when in the water.
Run a quick check to ensure that the spoons will unwind in the right direction by letting them go for a second. If they turn with the concave portion of the spoon touching the water first, they’re in the right position!

The STEM behind the Rubber Band Paddle Boat experiment
This experiment teaches:
Potential and kinetic energy
How it works.
In this experiment, the empty water bottle is the floating boat and the popsicle sticks, rubber band, and spoons are the propulsion system.
The empty water bottle floats because of the air trapped inside, making it less dense than the water and causing it to be buoyant.
We build up potential energy in the rubber band and the spoons (the paddle) by twisting the spoons around until they are wound up tightly. The potential energy stored up in the spoons turns to kinetic energy once we place the boat in the water and let it go!
The rubber band and spoon paddle create thrust (force) that propels the boat forward. This act of driving the boat forward is called propulsion.
The key ingredient to the propulsion here is Newton’s Third Law of Motion. You know the one: for every action, there’s an equal and opposite reaction.
When the spoons (paddle) push water backward (action), the water pushes back on the spoons with an equal and opposite force (reaction).
This reaction force propels the paddle boat forward. We can see this in action by observing how much water the paddle displaces and how the boat moves in response.
In this experiment, the empty water bottle with the cap still on is our boat that floats on the water.
Since the weight of the water bottle is less than its buoyant force, it floats. If the water bottle’s weight was more than its buoyant force, like if we added coins inside of the water bottle, it would sink.
We can also see potential and kinetic energy at work in this experiment!
When we wind up the spoons by twisting them inside of the rubber band, we are building the potential energy of the boat.
They see how the rubber band stores potential energy (by twisting it) which is then converted to kinetic energy (movement) when it unwinds and propels the boat.
When we twist the plastic spoons around the rubber band, we are building up potential energy for the paddle boat.
More experiments about potential and kinetic energy to try out with your child
Up, Up, and Away: DIY Balloon-Powered Helicopter Fun!
- Swinging Science: Creating mesmerizing pendulum art
- Building a Catapult: Physics experiment
Related experiments
Is your child interested in helicopters and all things that fly? This is going to be a fun engineering experiment for them! This balloon-powered helicopter teaches kids about fundamental physics...
Rocket Science at Home: Build a simple rocket launcher!
This simple experiment packs a knowledge punch. It's easy and quick to put together! This experiment utilizes potential and kinetic energy to blast our plastic cup rocket off. By pressing down on...

DIY Paddle Boat For Kids (Video)
Water science experiment is always a hit for the kids.
One of the coolest summer activities for kids is building a paddle boat.
Building a paddle boat is so easy and so much fun.
The boat makes a great toy .
You can use it on a pond, in a pool or even in a bathtub.
Just use things you probably already have around the house.
We have chosen to use pencils, rubber bands and little foam shapes
Let’s get started.
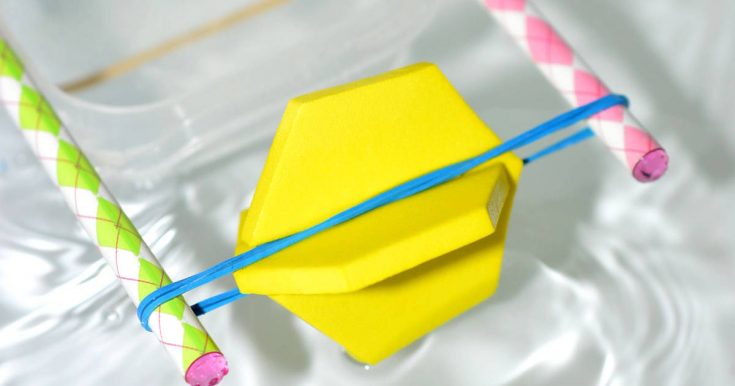
How To Build A Paddle Boat
Here is how to make a paddle boat.
- shallow plastic container
- 3 large rubber bands
- 2 pencils / popsicle sticks
- cardboard, thick piece of paper or foam shapes
- large bucket or a "pond" for the boat to drive
- adult supervision
Instructions

- Cut the cardboard into 4 small pieces that are small enough to fit in the space between the two pencils.
- On each cardboard, make a cut in the middle but stop half the way (do not cut it all the way).

- Fit the paddles onto the rubber bands.

- Although there are two paddle wheels, you can use only one of them or both. The second wheel is there for balancing the boat so it doesn't tilt. If you use both, be sure to turn both wheels in the same direction.
- Without releasing the twists, place the boat on the water and then let go.

Recommended Products
As an Amazon Associate, I earn from qualifying purchases.

Did you try this project?
Follow us on Pinterest and share a photo!
You have just built a paddle boat! In a real paddle boat, the spinning drum of paddle boards acts as oars, pushing against the water as it rotates.
Paddle boats were widely used in the early 19th century as an unique form of marine transportation.
A steam engine was used to drive a paddle wheel for propulsion and so they were called steamboats .
In this experiment, the paddles were driven by the unwinding rubber band, which you manually winded before putting it into the water.
So the kinetic energy from your hand was converted into the potential energy in the winded rubber band, which in turned was converted into the kinetic energy of the band as it unwinds and the paddles move as a result.
Want more engineering projects?
Try one of these comprehensive engineering kits.

Similar Posts

How To Make A Water Tornado
Tornadoes are incredibly destructive forces of nature that can cause catastrophic damage to communities and environments. They are capable of…
Water Cycle Project
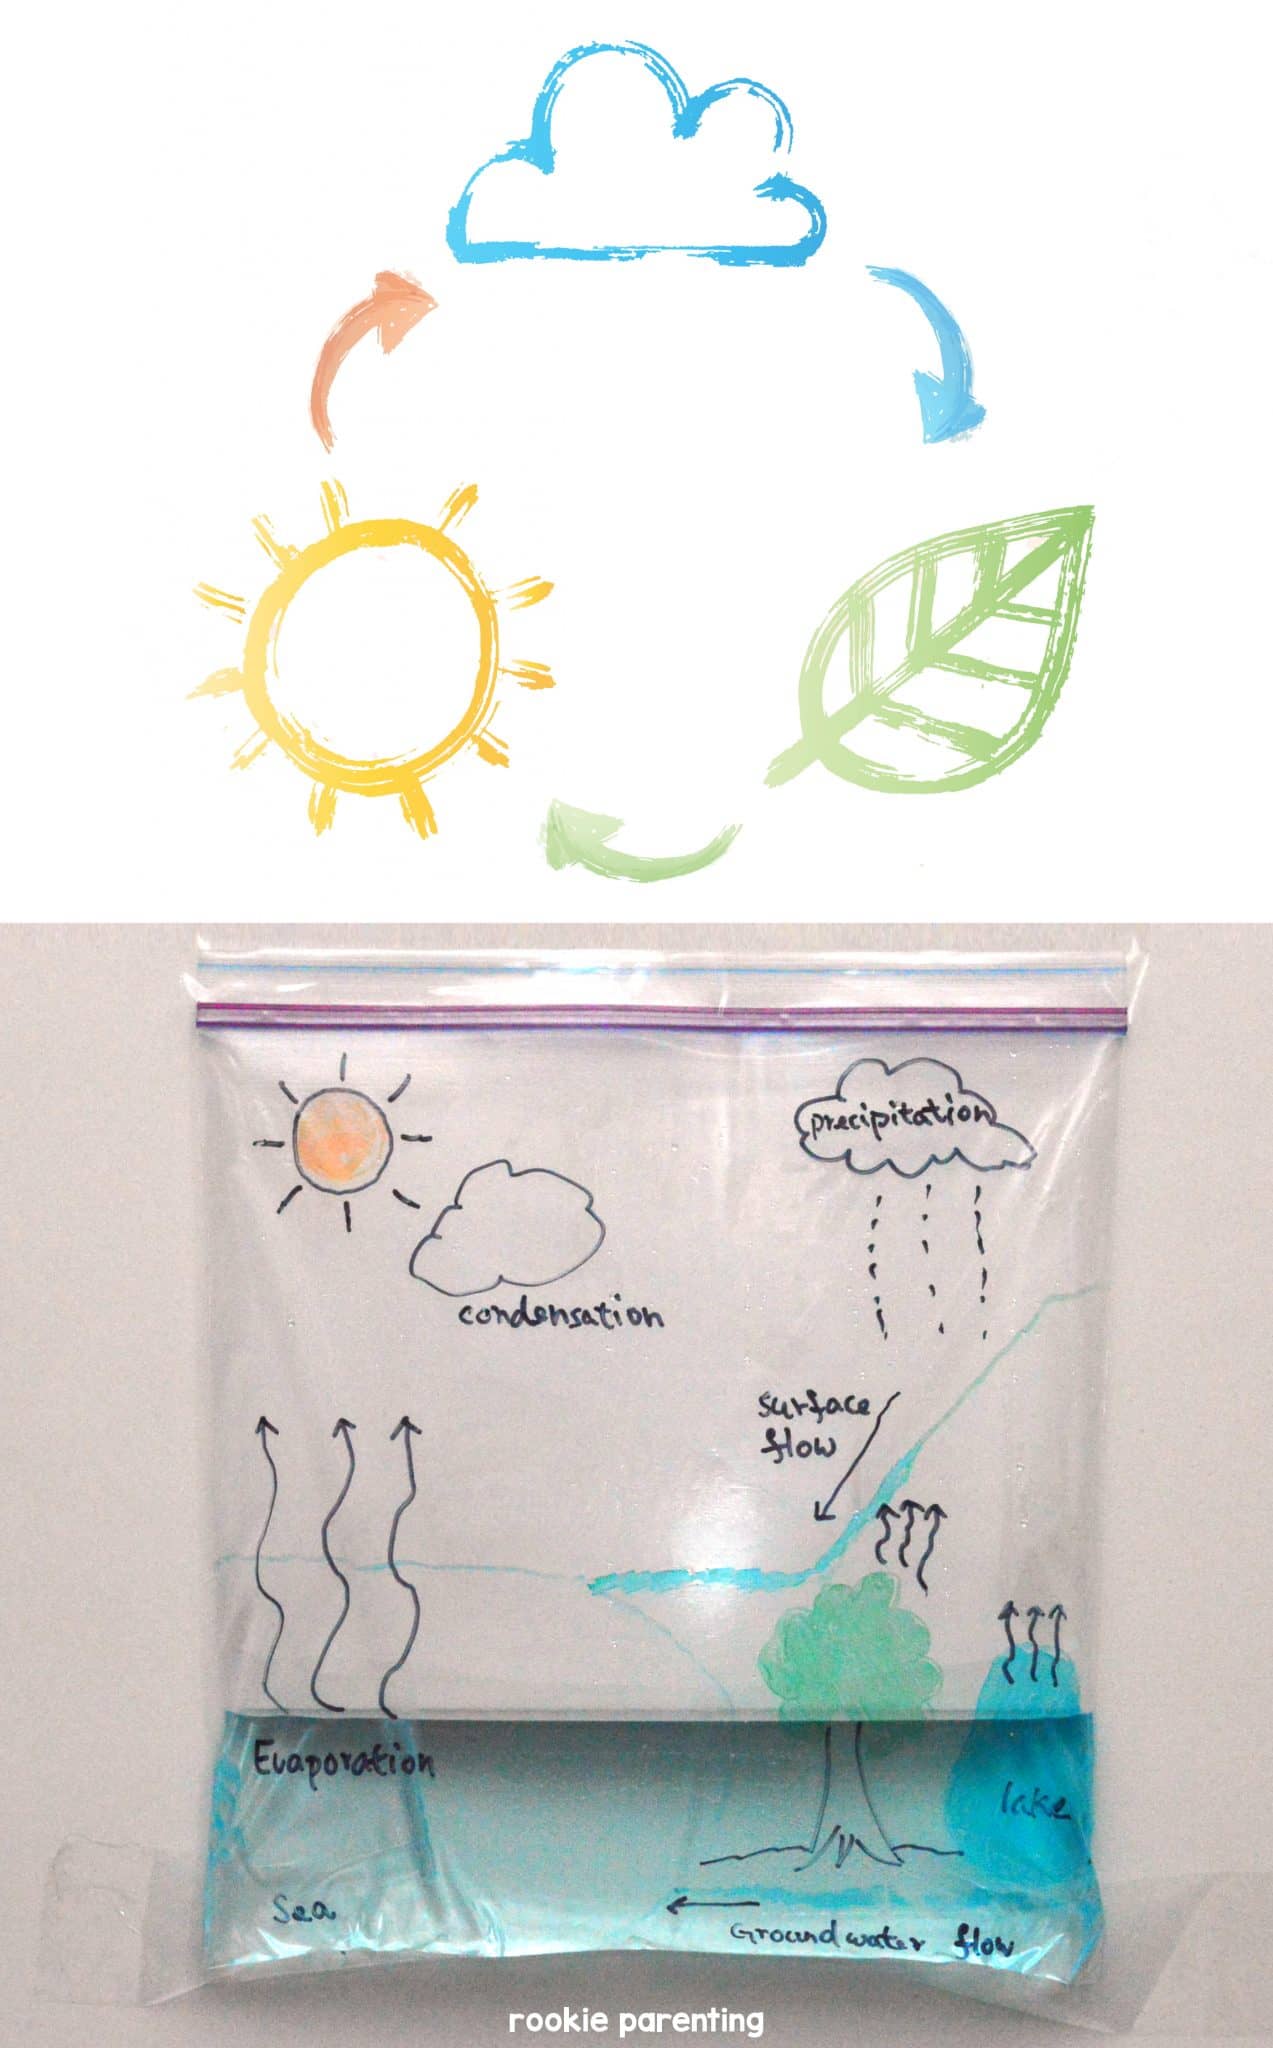
Here are three hands on water cycle experiments. These are inspirations and fun experiments for teachers, homeschool parents, and science…

Milk And Vinegar Reaction Experiment
What Is Plastic Made Out Of? What happens when you mix milk with vinegar? What is plastic made out of?…

Why Is Water Attracted To A Charged Balloon
Here is a simple physics experiment using a property called static electricity. Every object is made up of small particles…

Coin Experiment – Coin in Water
Did you know that water can play tricks on your eyes? This experiment is incredibly simple and requires only a…
How Many Drops of Water Can Fit on a Penny Surface Tension Experiment
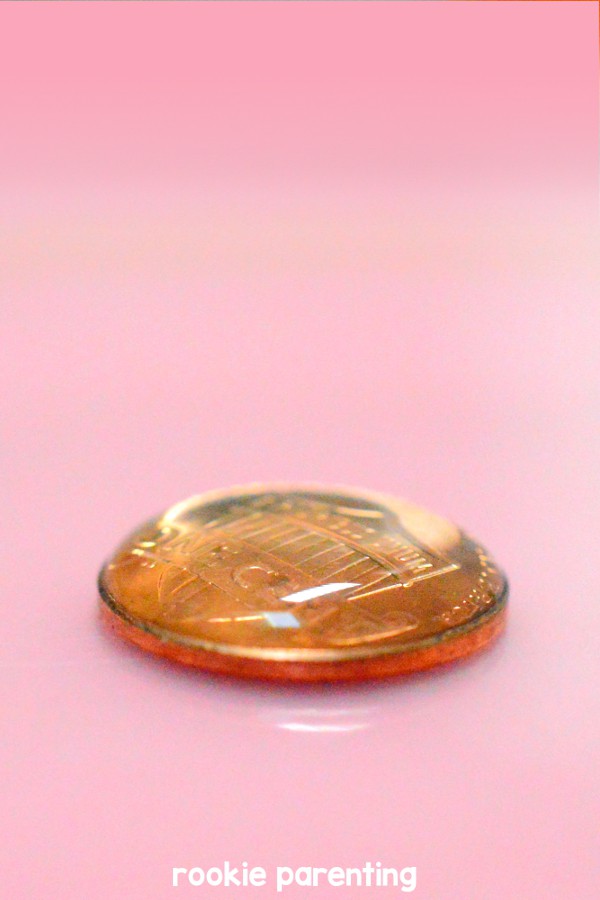
Surface tension is a force that pulls together the outermost molecules of a liquid. It makes water form tiny beads…
- Skip to primary navigation
- Skip to main content
- Skip to primary sidebar

- FREE Experiments
- Kitchen Science
- Climate Change
- Egg Experiments
- Fairy Tale Science
- Edible Science
- Human Health
- Inspirational Women
- Forces and Motion
- Science Fair Projects
- STEM Challenges
- Science Sparks Books
- Contact Science Sparks
- Science Resources for Home and School
Elastic Band Powered Boat
June 23, 2020 By Emma Vanstone Leave a Comment
When you stretch an elastic band with your fingers it uses energy. That energy isn’t lost, it is stored in the elastic band. When you release the pressure on the elastic band the energy is released and the band shrinks back to its original size.
Cotton reel cars are a great example of using this kind of stored energy to make something move.
Today we’re making an elastic band powered boat! It’s much easier than it looks and even my 13 year old was impressed!
What you’ll need:
Empty plastic container
3 lolly sticks or crafts sticks
Elastic band
Container of water
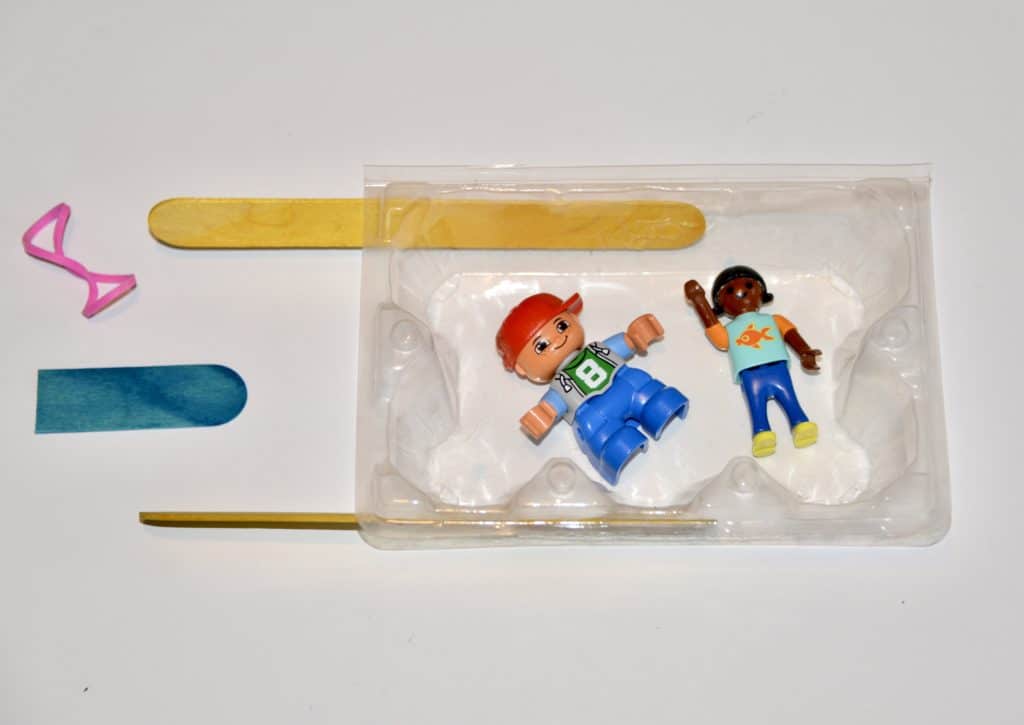
How to make an Elastic Band Powered Boat
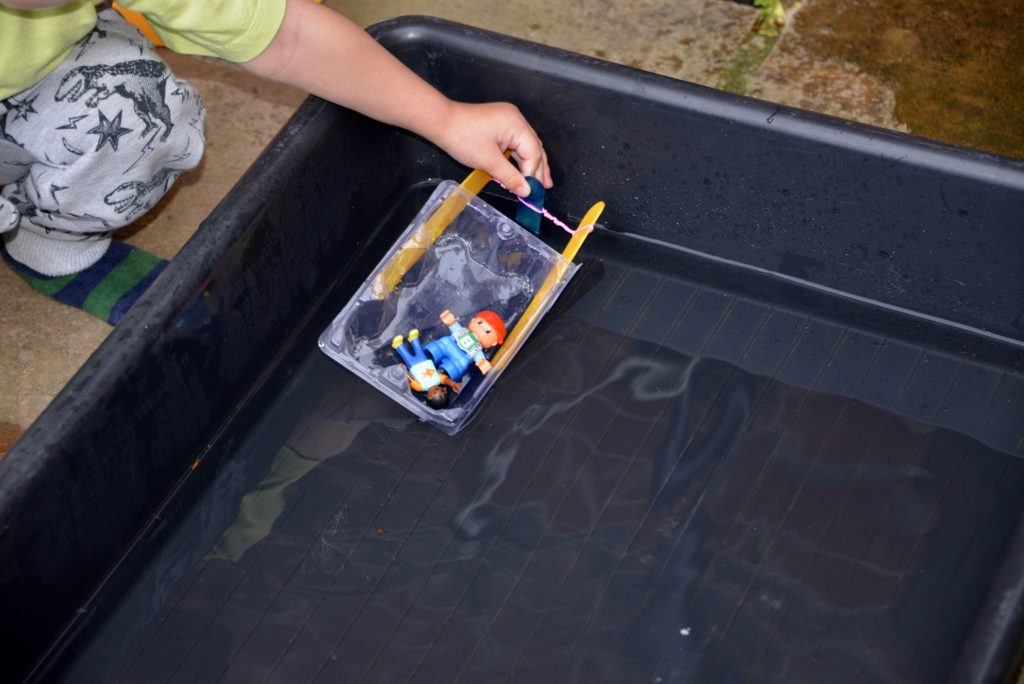
Glue a lollystick stick to each side of the plastic container.
Cut the third lolly stick in half.
Stretch the elastic band over the end of the two lolly sticks and wind the half lolly stick up in the band.
Place the boat in a tub of water and let go!

Why does an elastic band powered boat work?
As you wind the paddle with the elastic band, the band stretches, storing up energy. When you let the paddle go, the elastic band unwinds to shrink back to its original size releasing the stored energy and turning the paddle!
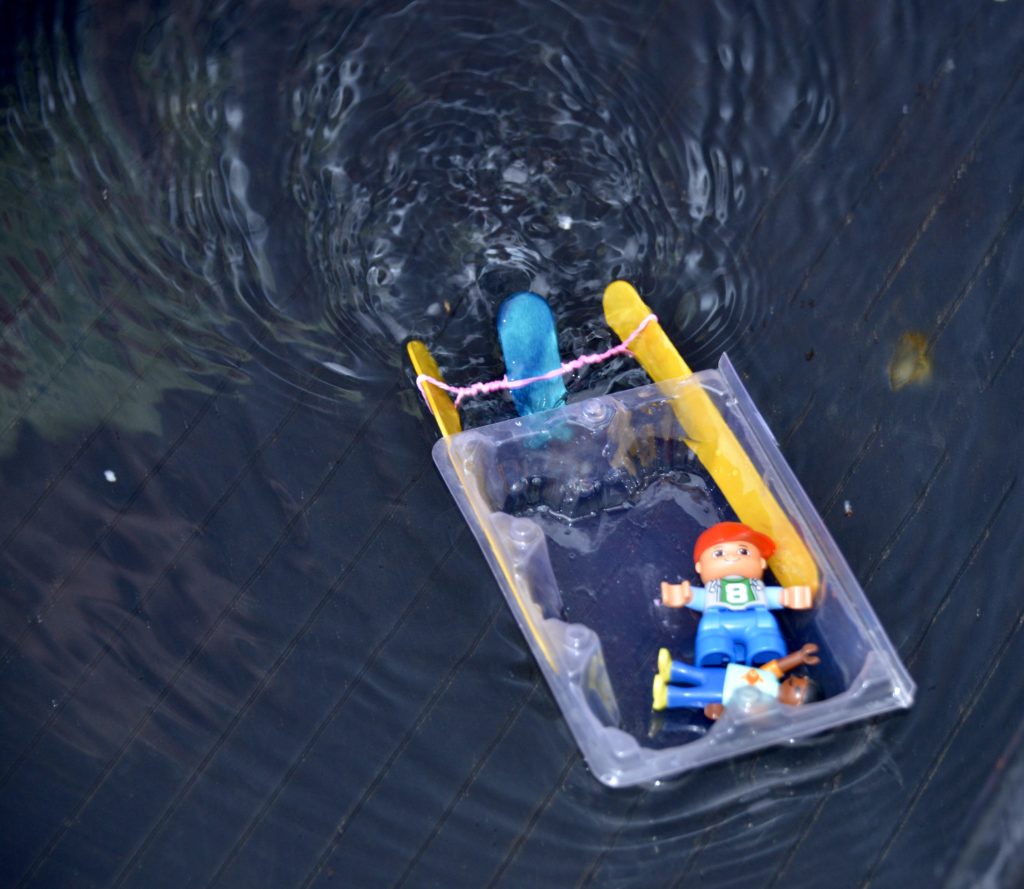
The turning of the paddle propels the boat through the water.
More elastic band powered experiments
Our elastic band slingshot is another great idea
Rookie Parenting has a slightly different design boat that looks brilliant too!
Last Updated on June 23, 2020 by Emma Vanstone
Safety Notice
Science Sparks ( Wild Sparks Enterprises Ltd ) are not liable for the actions of activity of any person who uses the information in this resource or in any of the suggested further resources. Science Sparks assume no liability with regard to injuries or damage to property that may occur as a result of using the information and carrying out the practical activities contained in this resource or in any of the suggested further resources.
These activities are designed to be carried out by children working with a parent, guardian or other appropriate adult. The adult involved is fully responsible for ensuring that the activities are carried out safely.
Reader Interactions
Leave a reply cancel reply.
Your email address will not be published. Required fields are marked *
Get Your ALL ACCESS Shop Pass here →

Mini DIY Paddle Boat
Make a paddle boat that actually moves through the water! This is an awesome STEM challenge for young kids and older ones too. Explore forces in motion with this simple DIY paddle boat activity. We have loads of fun STEM activities for you to try!

WHAT IS A PADDLE BOAT?
A paddle boat is a boat that is propelled by the turning of a paddle wheel. Steamer paddle boats were common in the 1800s and they had steam-powered engines which would turn the paddles.
Have you ever seen or used a people-powered paddle boat? It works by our feet using pedals to turn the paddle wheel just like riding a bike!
Our mini paddle boat engineering project below is propelled through the water because of the laws of physics.
When you twist the rubber band, you are creating potential energy. When the rubber band is released, this potential energy is converted to kinetic energy, and the boat moves forward.
Take up the challenge to make a mini paddle boat with our step by step instructions below. Find out what makes a paddle boat move through the water and see how far you can get it to travel.
💡 ALSO CHECK OUT: Physics Acti vities For Kids
CLICK HERE TO GET YOUR PRINTABLE STEM PROJECT!

DIY PADDLE BOAT
Watch the video:
- Boat template
- Rubber band
INSTRUCTIONS:
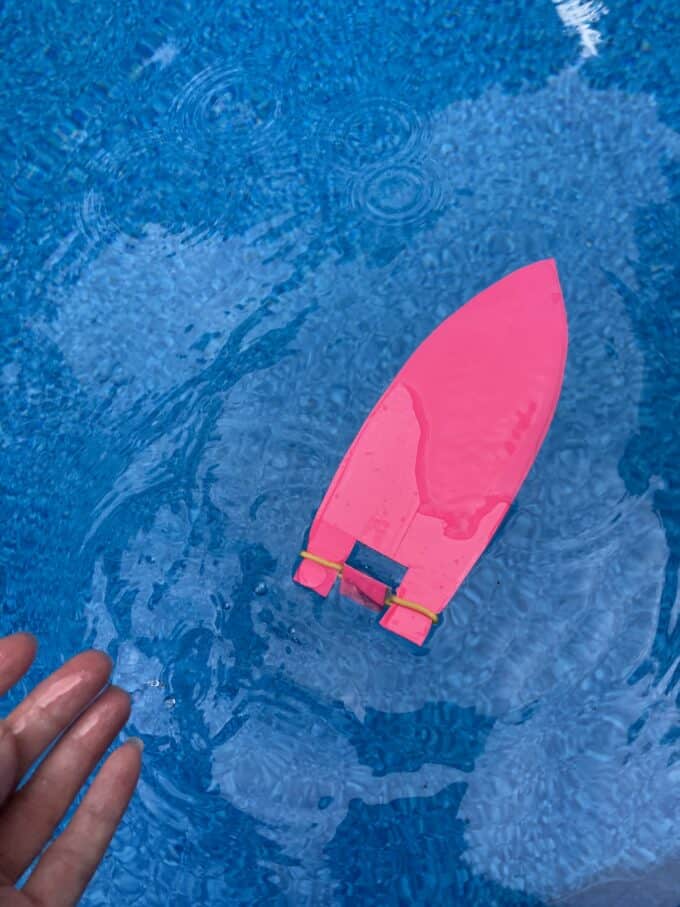
STEP 1: Print out the boat-shaped template .
STEP 2: Use the template to cut out a boat and paddle from the cereal box cardboard.

STEP 3: Cut your paddle to the smaller shape so that it will fit and spin.

STEP 4: Cover your boat and paddle with duct tape and trim to make it waterproof.

STEP 5: Attach the paddle to the rubber band with scotch tape.

STEP 6: Now stretch the rubber band across the bottom of the boat with the paddle in the middle and begin to twist the paddle.

STEP 7: Once the rubber band is tightly twisted, slowly release your boat into your pool or bowl of water and watch it go!
MORE FUN THINGS TO BUILD
- Also, try one of these easy and fun engineering projects below.
- Build a hovercraft that hovers.
- Be inspired by American mathematician Evelyn Boyd Granville and build a satellite .
- Design an airplane launcher to catapult your paper planes.
- A good breeze and a few materials are all you need to tackle this DIY kite project.
- It’s a fun chemical reaction that makes this bottle rocket take off.
- Build a working DIY water wheel .
- Make a balloon car .
STEM Resources To Get You Started
Here are a few resources that will help you introduce STEM more effectively to your kiddos or students and feel confident yourself when presenting materials. You’ll find helpful free printables throughout.
- Engineering Design Process Explained
- What Is An Engineer?
- Engineering Words
- Real World STEM
- Questions for Reflection (get them talking about it!)
- BEST STEM Books for Kids
- 14 Engineering Books for Kids
- Jr. Engineer Challenge Calendar (Free)
- Must Have STEM Supplies List
- Join us in the Club
Printable STEM Pack for Kids
80+ Doable Engineering Projects in one convenient pack!
- Full instructions with sample images
- Activity-specific instruction sheets
- Data Collection Sheets
- Questions for Reflection
- Architecture Building Cards: Try the tallest tower challenge
- Bridge Building Cards: Explore different types of bridges to build your own.
- Paper Chain STEM Challenge: Who can make the longest chain? Great icebreaker or quick challenge!
- 3 Little Pigs Architectural Pack: Design a house that won’t blow away!
- Great marshmallow challenge: A classic challenge kids love!
- Real-world STEM challenge lesson but don’t know where to start? Our easy-to-follow template shows the steps!
- What’s the difference between a scientist and an engineer?
- Crossword and word search with engineering vocabulary.
- Engineering vocabulary cards
- Design a one-of-a-kind invention and write about it with this 5-page activity!
Subscribe to receive a free 5-Day STEM Challenge Guide
~ projects to try now ~.

Paddle Boat STEM: Exploring Potential Energy and Boat Propulsion
Paddle Boat STEM Activity: Learning Potential Energy and Boat Propulsion
Welcome to an exciting STEM adventure where we'll build a paddle boat with a propeller powered by rubber bands! This hands-on activity is designed for elementary-aged kids, providing an engaging introduction to science and engineering concepts. Join us as we explore potential energy and discover how our boat moves in the water.
Materials Required:
- Recyclable plastic bottle (e.g., water bottle)
- 2 rubber bands
- 2 wooden skewers or straws
- Cardboard or foam board
- Pushpin or toothpick
Step-by-Step Instructions:
- Prepare the Bottle: Cut the plastic bottle in half, creating two separate pieces.
- Attach the Skewers: Insert a wooden skewer or straw into each half of the bottle, positioning them near the bottom.
- Secure the Skewers: Tape the skewers in place to ensure they remain stable.
- Create the Propeller: Cut a small square or rectangular piece of cardboard or foam board.
- Attach the Propeller: Push the pushpin or toothpick through the center of the propeller and attach it to the front of one of the skewers.
- Add the Rubber Bands: Wrap a rubber band around each skewer, creating a loop that connects the two skewers.
- Test the Boat: Place the boat in a container of water and gently twist the rubber bands. Observe how the propeller spins and propels the boat forward.
Exploring Potential Energy:
As you twist the rubber bands, you are storing potential energy in them. When you release the rubber bands, this stored energy is released, causing the propeller to spin and the boat to move. This demonstrates the concept of potential energy being converted into kinetic energy, which is the energy of motion.
Learning about Boat Propulsion:
The spinning propeller creates thrust, which pushes the water backward. This backward force propels the boat forward, demonstrating the principle of Newton's third law of motion: for every action, there is an equal and opposite reaction.
Additional Exploration:
- Experiment with different propeller designs and observe how they affect the boat's movement.
- Try using different materials for the boat, such as aluminum foil or plastic wrap.
- Investigate how the size and shape of the boat impact its speed and maneuverability.
Conclusion:
Building a paddle boat with a propeller and rubber bands is a fun and educational STEM activity that teaches kids about potential energy, boat propulsion, and engineering principles. By engaging in hands-on experiments, children develop a deeper understanding of scientific concepts and foster their curiosity and creativity.
Share Your Creations:
We encourage you to try this activity and share pictures of your paddle boats with us on social media. Let's inspire each other and continue exploring the world of STEM together!
© 2024 by SchoolTube
Username or Email Address
Remember Me
Forgot password?
Enter your account data and we will send you a link to reset your password.
Your password reset link appears to be invalid or expired.
Privacy policy.
To use social login you have to agree with the storage and handling of your data by this website. Privacy Policy
Add to Collection
Public collection title
Private collection title
No Collections
Here you'll find all collections you've created before.
- Monday, Thursday, Friday from 9 am to 3 pm and Saturday, Sunday from 9 am to 5 pm
- Subscribe to Our Newsletter
Build Your Own Paddle Boat
- Exhibits + Activities
- Tickets + Pricing
- Planetarium
- Accessibility
- Directions + Building Maps
- Public Events
- Field Trips + Homeschool
- Private Event Rentals
- Become a Member
- Sponsorship + Corporate Giving
- Giving Impact
- Meet the Team
- Frequently Asked Questions
- In the Press
- Buy Tickets
- Subscribe to our newsletter
Monday, Thursday, Friday from 9am to 3pm
Saturday and Sunday from 9am to 5pm
Full Screen Modal Title
Search this site.
SEARCH RESULTS
By Anna Goolsby, Marketing Assistant
Full STEAM ahead! Add some splishy-splashy playtime to your learning with this fun and simple DIY engineering activity. Learn now to design and build your very own paddle boat just like an engineer using objects and tools found around your home. This is a great project to do either outside in an inflatable pool or inside in your bathtub! No matter the weather, you can have fun making waves and learning more about engineering!
Want to experience more engineering fun? Join us the week of Feb. 19 for Engineers Week – a week full of hands-on activities and exciting demonstrations that celebrate the power of engineering.
- Plastic Water or Pop Bottle
- 2 Wooden Chopsticks
- Plastic Milk Jug
- Rubber Band (thicker is better)
- Packing Tape
- Inflatable Pool or Bathtub
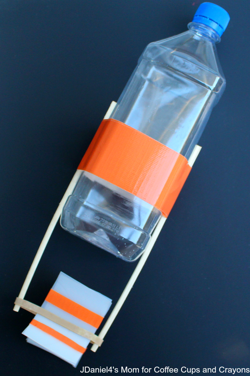
Use the photo from Coffee Cups and Crayons for reference!
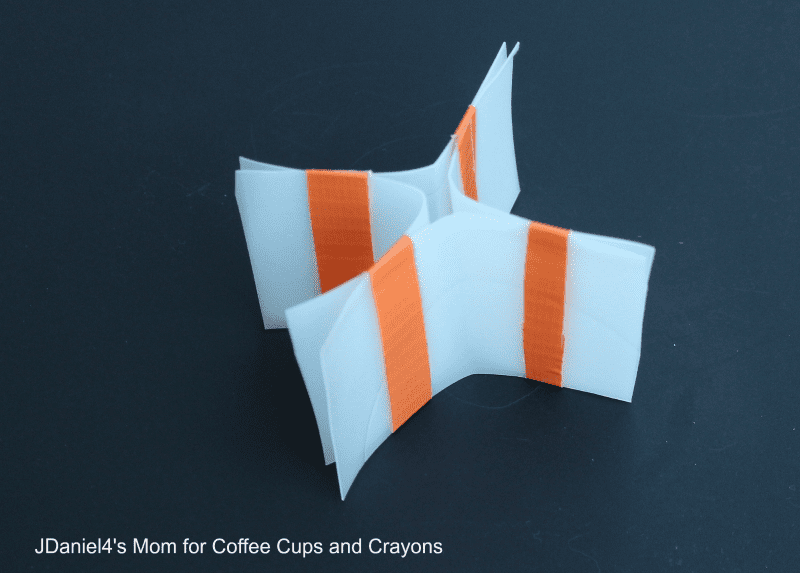
Cut out four (4) rectangular pieces of the plastic milk jug that are two (2) inches by three (3) inches. Use your ruler to measure and your pencil to mark the outline of your pieces before cutting with your scissors to make sure they are even and straight. (Remember: Measure twice, cut once!) After you are done cutting, you can erase whatever marks are left from your pencil. Fold each piece in half so they make an “L” shape. Use thin strips of duct tape to tape each angle to one another, creating a cross shape. Set aside.
Using packing tape, attach your chopsticks to either side of your plastic bottle, letting half of the chopstick hang off the back of the bottle. When you are satisfied with your placement, use your duct tape to secure the chopsticks and bottle. Take your rubber band and fit it over the ends of your chopsticks, making sure it fits and isn’t too stretched or loose. Finally, take your cross shape and slide two of the “blades” through the rubber band, creating your paddle. Twist the paddle away from your new boat and watch as it scuttles over the water in your pool or bathtub!
Further Exploration:
- What happens if you twist the paddle toward the boat?
- Does it make a difference if you move the rubber band and paddle closer to the boat? Further away?
- What makes the water move away from the paddle as it turns?
- What happens if you twist the paddle more? Less?
- 4th of July
- Announcement
- Cooking Candy
- DIY Science
- Early Explorers
- Endothermic
- Engineering
- Environment
- Experimentation
- For Preschoolers
- Galactic Gardens
- Marine Biology
- Math Moves!
- Mathematics
- Meteorology
- Outdoor Fun
- Pollinators
- Red-White—BOOM
- Solar Eclipse
- Special Events
- Storybook STEM
- Tinkering Garage
- Uncategorized
- Water Cycle
- Winter Wonders
RECENT POSTS

- October 2024
- August 2024
- February 2024
- January 2024
- October 2023
- February 2023
- August 2022
- February 2022
- December 2021
- October 2021
- February 2021
- September 2020
- October 2019
- September 2019
- January 2019
- December 2018
- October 2018
- September 2018
- August 2018
- February 2018
- January 2018
- December 2017
- November 2017
- November 2015
- October 2015
- September 2015
- August 2015
- Privacy Policy
Coffee Cups and Crayons
Simple play ideas, learning activities, kids crafts and party ideas, plus acts of kindness for kids!
July 11, 2016
STEM for Kids: Build a Paddle Boat
Paddle Boat STEM Activity
- Plastic Bottle (We used a plastic bottle that had four flat sides.)
- Two Wooden Chopsticks
- Plastic Milk Jug
- Rubber band (We used a thick medium sized rubber band)
- Packing Tape
Build a Paddle Boat
Cut out four rectangular pieces out of the plastic milk jug. The pieces need to be 2 inches by 3 inches long. You will want to use a pencil to draw your squares onto the milk jug. That will help you cut out rectangles with straight sides. The pencil lines will be easy to erase once you have cut out your rectangles.
Each of the rectangles will then be folded in half. You will then duct tape one side a rectangle to the side of another rectangle to create a cross shape. You could create the cross shape and then tape the sides together. We found that taping one set of sides at a time worked for us.
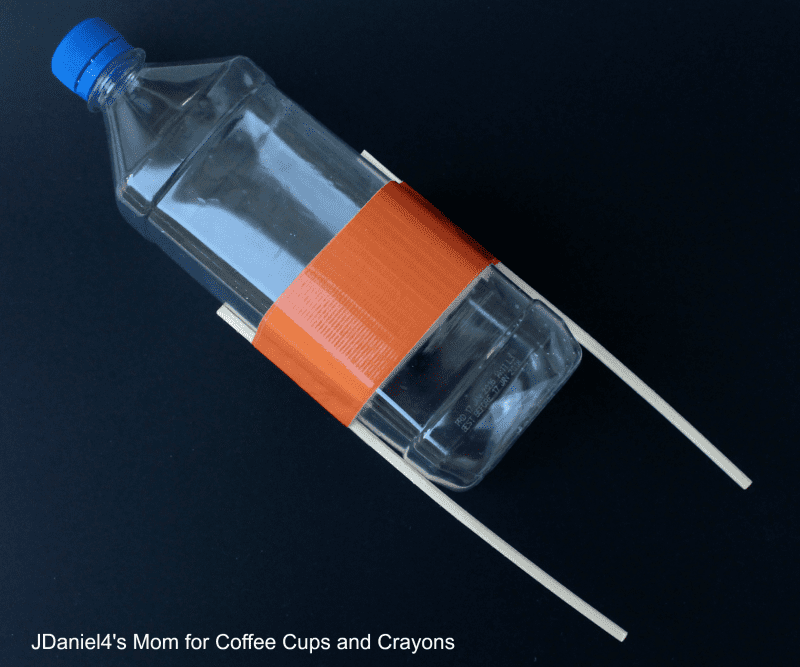
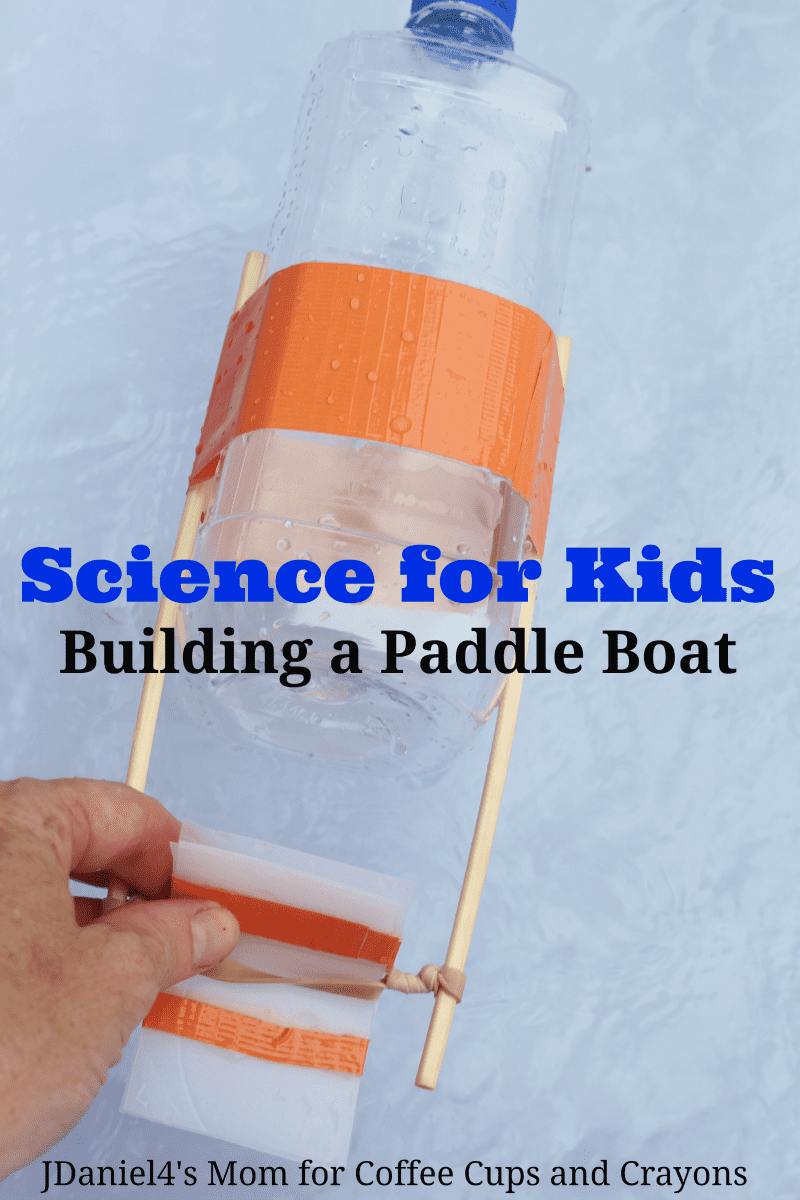
Now you will be attaching the chopsticks to opposite sides of the bottle. You will attach the chopsticks about ¾ of the way down the bottle with packing tape. You will want at least 3 or 4 inches of each of the chopsticks to hang off the back of the bottle. When you have the chopsticks right where you want them to be, you will wrap duct tape around the area where the strapping tape is.
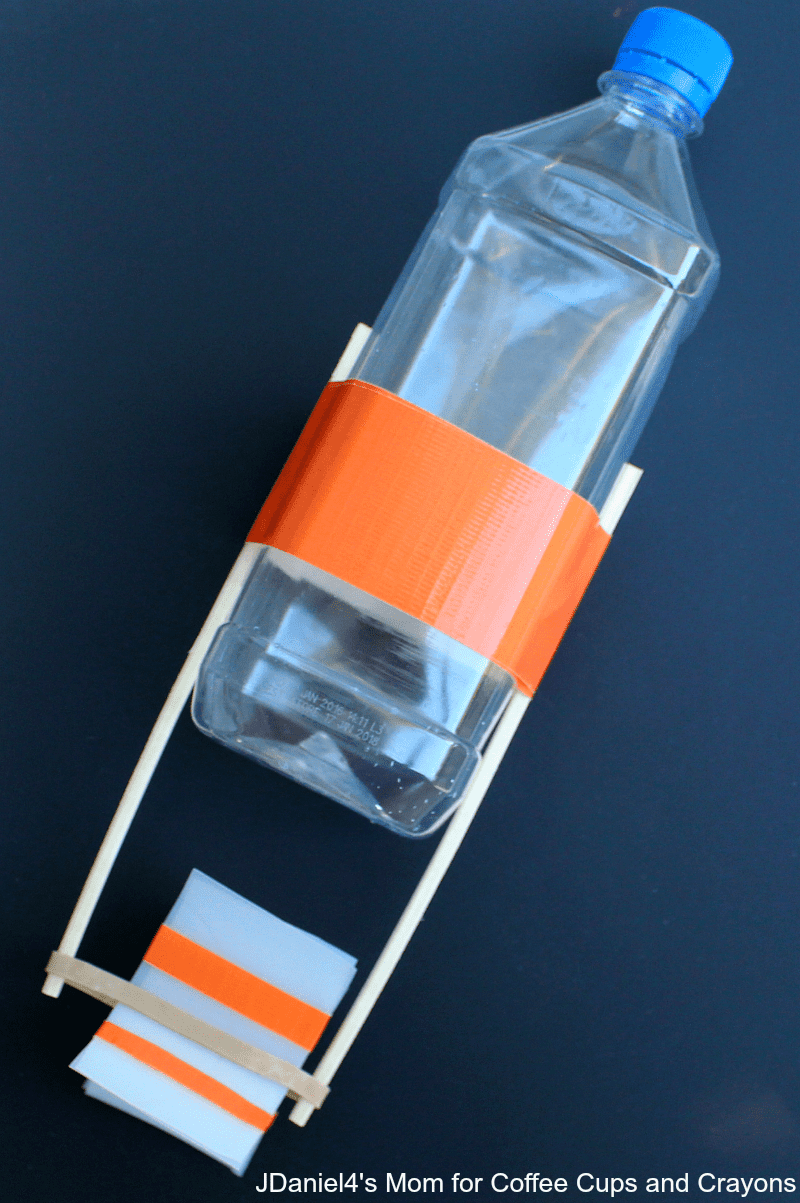
Attach the rubber band to the chopsticks. It should fit perfectly. You don’t want it to be stretched out.
Finally you slide two blades of the paddle through the rubber band.
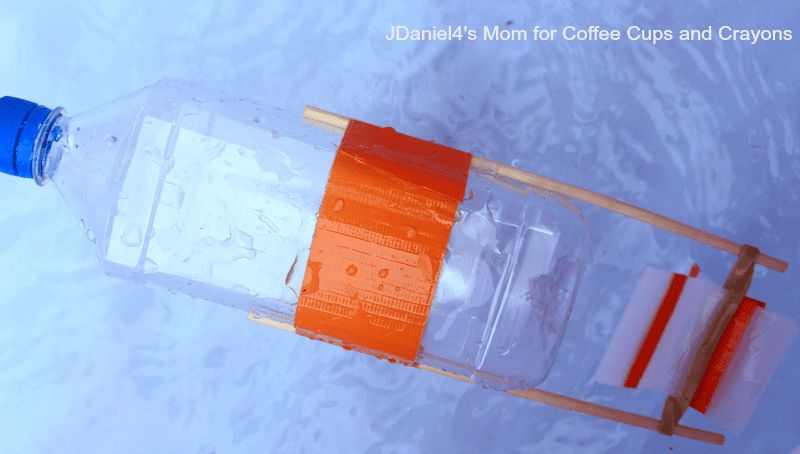
Science for Kids- Things to Observe
- See if winding the paddle forward makes it go forward.
- See if winding the paddle backwards makes it backward.
- See if moving the rubber band closer to the boat makes a difference it how it moves.
- See how many times you can wind up the paddle in the rubber band. Decide if it makes a difference in how long it moves.

Don’t let the fun and discovery stop there!
We have TONS of science experiments your kids will love on our Super Cool Science Experiments for Kids page!
Take me to the experiments –> Super Cool Science Experiments for Kids
About Megan Sheakoski
Megan is the creator of Coffee Cups and Crayons, a blog full of simple fun and learning. She believes that kids’ activities don’t have to be complicated to be fun and that learning is better with play.
July 14, 2017 at 7:58 pm
Nice project. I write for an after school care program and really want to use your photos. I hope you don’t mind.
July 17, 2017 at 3:14 pm
Hi Kenna! You can use one photo with a link back to the post for the instructions. Thanks!
May 22, 2019 at 4:21 am
Hi Megan, just a small edit. You typed “think rubber band” instead of “thick”.
May 29, 2019 at 2:25 pm
Thank you!!!
June 1, 2019 at 11:52 am
Awesome post. I plan on building one for my nephew and niece later today.
Just a hint though, for a faster boat, use a coke bottle or something with “more rounded” edges.
Keep up the good work tho!
Leave a Reply Cancel reply
Your email address will not be published. Required fields are marked *

COMMENTS
In this project you built a miniature version of a paddle boat. In the 1800s, large steam-powered boats that could carry lots of people were propelled by large paddles. Today, smaller recreational boats are powered by people, who sit and use pedals to turn the paddles, just like riding a bike.
Can you add a rudder that helps the boat go straight? Can you build a paddle with more than two blades, like a real paddle boat? What happens if you wind the rubber band more tightly, or use a different rubber band? Try making improvements to your boat and test it again.
The Paddle Boat STEM experiment demonstrates propulsion to kids by building a propeller that spins in the water, pushing the boat forward. It also demonstrates potential and kinetic energy, as you build up the paddles and let them go in the water .
Make a simple rubber band-powered paddle boat with popsicle sticks in this fun STEM activity! Written instructions available on the Science Buddies website: ...
Build a rubber-band powered paddle boat in this awesome science experiment. Learn about energy conversion.
When you let the paddle go, the elastic band unwinds to shrink back to its original size releasing the stored energy and turning the paddle! The turning of the paddle propels the boat through the water.
Make a paddle boat that actually moves through the water! This is an awesome STEM challenge for young kids and older ones too. Explore forces in motion with this simple DIY paddle boat activity. We have loads of fun STEM activities for you to try!
Paddle Boat STEM Activity: Learning Potential Energy and Boat Propulsion. Welcome to an exciting STEM adventure where we'll build a paddle boat with a propeller powered by rubber bands! This hands-on activity is designed for elementary-aged kids, providing an engaging introduction to science and engineering concepts.
2/13/18. Build Your Own Paddle Boat. By Anna Goolsby, Marketing Assistant. Full STEAM ahead! Add some splishy-splashy playtime to your learning with this fun and simple DIY engineering activity. Learn now to design and build your very own paddle boat just like an engineer using objects and tools found around your home.
July 11, 2016. STEM for Kids: Build a Paddle Boat. 2934 shares. STEM activities for kids that involve water, like this DIY plastic paddle boat, are always a hit. After we learned how to build a paddle boat, we had fun testing it out in an inflatable pool in our backyard.