September 13, 2012

Sculpted Science: Turn Milk into Plastic!
A curdling chemistry craft from Science Buddies
By Science Buddies
On supporting science journalism
If you're enjoying this article, consider supporting our award-winning journalism by subscribing . By purchasing a subscription you are helping to ensure the future of impactful stories about the discoveries and ideas shaping our world today.
Key concepts Plastic Polymers Milk Casein Introduction Have you ever heard that plastic can be made out of milk? If this sounds far-fetched, you may be surprised to learn that from the early 1900s until about 1945, milk was commonly used to make many different plastic ornaments. This included buttons, decorative buckles, beads and other jewelry, fountain pens, the backings for hand-held mirrors, and fancy comb and brush sets. Milk plastic (usually called casein plastic) was even used to make jewelry for Queen Mary of England! In this activity, you will make your own casein plastic out of hot milk and vinegar. Background Plastics are a group of materials that may look or feel different, but can all be molded into varied shapes. The similarities and differences between different plastic products come down to the molecules that comprise them. All plastics are composed of molecules that repeat themselves in a chain, called a polymer. Polymers can be chains of either one type of molecule or different ones, which are linked together in a regular pattern. Also, in a polymer, a single repeat of the pattern of molecules is called a monomer, which can consist of just one type of molecule or include several different kinds. Milk contains many molecules of a protein called casein. Each casein molecule is a monomer and a chain of casein monomers is a polymer. The polymer can be scooped up and molded, which is why plastic made from milk is called casein plastic. Materials • Measuring cup • Milk • Stove-top oven and pan or a microwave and microwaveable container • Mug or other heat-resistant cup • Measuring spoons • White vinegar • Paper towels • A clean, hard surface that is will not be damaged by dampness • Spoon • Cookie-cutters, glitter, food coloring, markers (all optional) • Adult help and supervision with heating and handling hot liquids Preparation • Heat one cup of milk in a pan or on a stove top until it is steaming hot. Alternatively, you can microwave the milk in a microwaveable container by warming it at 50 percent power for five minutes. It should be about the same temperature as milk you would use to make hot cocoa; heat longer if needed. Procedure • Add four teaspoons (tsp.) of white vinegar to a mug or other heat-resistant cup. • Add the cup of hot milk to the mug. You should see the milk form white clumps that are called curds. Why do you think the milk forms curds when it is added to the vinegar? What do you think they are made of? • Mix the mug slowly with a spoon for a few seconds. What happens when the milk and vinegar are mixed together? Why do you think this is? • Stack four layers of paper towels on a hard surface that will not be damaged if it gets damp. • Once the milk and vinegar mixture has cooled a bit, use a spoon to scoop out the curds. You can do this by tilting the spoon against the inside of the mug to let excess liquid drain out while retaining the curds in the spoon. Collect as many curds as you can in this way and put them on top of the paper towel stack. • Fold the edges of the paper towel stack over the curds and press down on them to absorb excess liquid. Use extra paper towels if needed to soak up the remaining moisture. • Knead all of the curds together into a ball, as if it were dough. What you have in your hands is casein plastic. How do the kneaded curds feel and look different from the original ones? • If you want to use the casein plastic to make something, you can color, shape or mold it now (within an hour of making the plastic dough) and leave it to dry on paper towels for at least 48 hours. Once it has dried, the casein plastic will be hard. • Tip: To shape the plastic, the dough must be thoroughly kneaded. Molds and cookie-cutters work well or, with more patience, the dough can be hand sculpted. Food coloring, glitter or other decorative bits can be added to the wet casein plastic dough, and dried casein plastic can be painted or colored with markers. • Extra: How does the amount of vinegar used affect the yield of casein plastic? To find out, you can repeat this activity—but in addition to testing four tsp. of white vinegar with one cup of hot milk, try also testing one tsp., two tsp. or eight tsp. of the vinegar, each with one cup of hot milk. To collect the most curds and get a better idea of their casein plastic yield, instead of scooping the curds with a spoon, you can pour the vinegar and milk mixture through a piece of cotton cloth (such as an old T-shirt) secured with rubber bands on top of a cup. • Extra : In addition to vinegar, there are a lot of other acids that we encounter in the kitchen all the time, such as lemon juice, orange juice, soda pop and tomato juice. Do some of these common acids work better than others for making casein plastic? • Extra : You used hot milk in this activity that was not at a specific temperature, but using hotter or colder milk might affect the casein plastic reaction. Design an experiment to investigate this. How does the temperature of the milk affect how much casein plastic you can produce? Observations and results Were you able to see the curds when the hot milk and vinegar were mixed together, and could you scoop out the curds to make casein plastic? After you add the hot milk to the vinegar, small, white chunks—or curds—should become visible in the mixture. This is because adding an acid (such as vinegar) to the milk changes the latter's pH (acidity) and makes the casein molecules unfold and reorganize into a long chain, thereby curdling the milk. You should be able to use a spoon to separate the curds from most of the liquid. Additional drying of the curds with the paper towels should make the curds ready to knead into a ball and use as casein plastic, which can be molded and decorated. More to explore Polymer Basics from Polymer Science Learning Center, Department of Polymer Science, the University of Southern Mississippi Casein from Plastics Historical Society Welcome to the Caseino: A virtual museum devoted to casein plastics from John Morgan Turn Milk into Plastic! from Science Buddies
This activity brought to you in partnership with Science Buddies

- Science Notes Posts
- Contact Science Notes
- Todd Helmenstine Biography
- Anne Helmenstine Biography
- Free Printable Periodic Tables (PDF and PNG)
- Periodic Table Wallpapers
- Interactive Periodic Table
- Periodic Table Posters
- Science Experiments for Kids
- How to Grow Crystals
- Chemistry Projects
- Fire and Flames Projects
- Holiday Science
- Chemistry Problems With Answers
- Physics Problems
- Unit Conversion Example Problems
- Chemistry Worksheets
- Biology Worksheets
- Periodic Table Worksheets
- Physical Science Worksheets
- Science Lab Worksheets
- My Amazon Books
Turn Milk Into Plastic

Turning milk into plastic is a fascinating exploration of the intersection of chemistry and everyday materials. This project not only provides a hands-on learning experience, but also opens the door to further experimentation and discovery. While most modern plastics come from petrochemicals, milk contains the protein casein , which forms a natural polymer. The project is easy and fun and only requires familiar everyday materials.
Background Information
History of Casein Plastic

People have been using the milk protein casein for making plastic for over a century. Casein plastic, known as Galalith, was first produced in the late 19th and early 20th centuries. Galalith was popular for making buttons, jewelry, fountain pens, and even knitting needles. Its production peaked before the widespread use of synthetic plastics derived from petroleum.
Commercial Casein Plastic vs. Homemade Casein Plastic
Commercial casein plastic production involves a more controlled and precise process, often incorporating formaldehyde or other toxic additives to enhance the material’s properties, such as durability and flexibility. In contrast, the homemade method is simpler and non-toxic, produces a less refined product. Homemade plastic from milk is ideal for educational purposes and small craft projects.
Materials Needed
The only ingredients you need are milk and vinegar. For best results, use a measuring cup and measuring spoons.
- 1 cup of milk (any type, though whole milk works best)
- 4 teaspoons of white vinegar (other types work, but impart color)
- A stove, hot plate, or microwave oven
- A small saucepan (for the stove or hot plate) or a bowl (for the microwave)
- A measuring cup and measuring spoons
- Paper towels or a cheesecloth or old piece of t-shirt
- Molds or cookie cutters (optional for shaping)
- Food coloring, glitter, or acrylic paints (optional for decorating)
- Heat the Milk : Pour the milk into the saucepan and heat it over medium heat until it is hot but not boiling. Stir occasionally to prevent a skin from forming on the surface. Alternatively, heat the milk in a bowl in the microwave so that it is hot, but not boiling. The time depends on the appliance power, but it’s around 90 seconds.
- Add Vinegar : Remove the milk from the heat and add the vinegar to the hot milk. Stir the mixture for a few minutes. If you like, add glitter or food coloring. Notice the milk beginning to curdle as the casein proteins separate from the liquid.
- Strain the Curds : Pour the mixture through a paper towel or cloth to separate the solid curds from the liquid whey. Press out as much liquid as possible from the curds.
- Shape the Plastic : While the curds are still pliable, mold them into the desired shapes using your hands, candy molds, or cookie cutters. Kneading the curds before molding or cutting them yields the smoothest finish.
- Drying : Place the shaped plastic on a paper towel and let it dry for at least 48 hours. The plastic hardens as it dries.
- Decorate : Once the plastic is completely dry, decorate it with acrylic paints or other craft materials. For a shiny finish, sand any rough edges and coat the plastic with craft sealant.
Safety Information
- Heat Safety : Be cautious when heating the milk. Use a stove or hot plate with adult supervision if necessary.
- Handling : The curds may be slightly acidic due to the vinegar, so wash your hands after handling them.
- Ventilation : Ensure the area is well-ventilated or else the odor of vinegar and curdled milk will linger.
- Disposal: Don’t discard unused casein down the drain, as it clogs pipes. Instead, throw away any leftover material.
The Chemistry Behind the Process
Milk contains a protein called casein, which coagulates when exposed to an acidic substance like vinegar (diluted acetic acid). The low pH disrupts the micelles in milk that consist of calcium phosphate and casein, making the protein accessible. In the presence of heat , the casein molecules unfold and reorganize into long chains, forming a polymer . This polymer network traps the liquid whey, which you separate out, leaving behind a solid mass of casein plastic. The process of adding vinegar essential curdles the milk. This is a form of denaturation and precipitation , common in many biochemical processes.
You can use pretty much any mammal milk (cow, sheep, goat, camel, etc.) for this project. However, human milk only contains low levels of casein, so it is not a great choice.
Turning the Project Into an Experiment
To transform this project into an experiment , consider the following variables :
- Type of Milk : Test different types of milk (whole, skim, soy, almond) and see how they affect the quantity and quality of the plastic produced.
- Amount of Vinegar : Vary the amount of vinegar added to the milk and observe the effects on the curdling process and the final product.
- Other Acids: Test the effectiveness of other common safe household acids, such as lemon juice, carbonated soda, or citric acid.
- Heating Temperature : Experiment with different temperatures for heating the milk to see how it impacts the separation of curds and whey.
- Drying Time : Compare the properties of the plastic with different drying times (24, 48, 72 hours).
Record your observations for each variable, noting changes in texture, strength, flexibility, and appearance of the plastic. This systematic approach aids in understand the factors influencing the production and properties of casein plastic.
How to Turn Plant-Based Milk Into Plastic
While it is a spoiler alert if you’re testing types of milk for an experiment, here is what you need to know if you’re using a plant-based milk for this project. Plant-based milks contain proteins, but these proteins differ significantly from the casein found in animal milk. The chance of getting plastic from plant milks depends on the type and structure of these proteins.
Soy milk contains proteins, such as glycinin and beta-conglycinin. These proteins denature and form a gel-like substance following exposure to heat and acidic conditions, similar to the process with casein in cow’s milk. However, the resulting material has different properties from casein plastic. Basically, the procedure produces tofu. Of all the plant-based milks, soy milk has the best chance of forming a plastic.
Almond Milk
Almond milk contains fewer proteins compared to soy milk and cow’s milk. The primary protein in almond milk is amandin. Although it coagulates, the amount of protein is generally too low to form a substantial polymer network similar to casein plastic. If you want plastic from almond milk, you’ll need a lot more milk than just one cup of it.
Other Plant-Based Milks
Other plant-based milks, such as oat, rice, and coconut milk, have varying protein contents and structures. Generally, these milks have lower protein concentrations than animal milk. As with almond milk, you need a lot more milk to get a decent amount of plastic. But, the basic process remains the same. Heat the milk, add vinegar, and strain the solids.
- Panouillé, M.; Durand, D.; et al. (2005). “Aggregation and gelation of micellar casein particles”. Journal of Colloid and Interface Science . 287 (1): 85–93. doi: 10.1016/j.jcis.2005.02.008
- Robinson, R. (2012). Robinson: Modern Dairy Technology: Volume 1 Advances in Milk Processing . Springer Science & Business Media. ISBN 9781461520573.
- Trimborn, Christel (August 2004). “ Jewelry Stone Make of Milk “. GZ Art+Design.
Related Posts


Make Plastic From Milk
Make plastic from milk? It seems like some sort of lactose intolerant horror story, but it’s actually a really cool science process. Create your own toys, beads, jewelry, and more, with ingredients you have right now in your kitchen. It’s so easy and super cool!
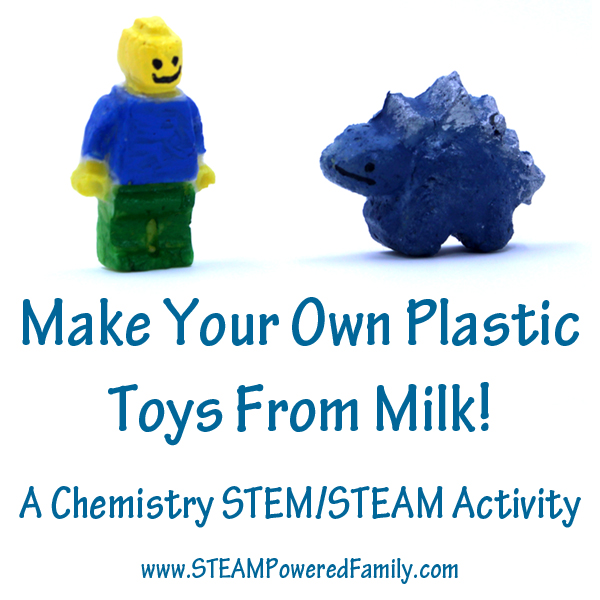
Turn Milk Into Plastic Toys!
Table of Contents
Disclaimer: This article may contain commission or affiliate links. As an Amazon Influencer I earn from qualifying purchases. Not seeing our videos? Turn off any adblockers to ensure our video feed can be seen. Or visit our YouTube channel to see if the video has been uploaded there. We are slowly uploading our archives. Thanks!
Also known as casein plastic, this process has been used for over 100 years and is the way they used to make plastics before 1945 when synthetic plastics were introduced. Even royalty wore jewelry made from milk plastic many years ago. How cool is that?
With this simple process you can make toys, beads, jewelry, decorative pieces and more. This is a great, budget friendly experiment, with spectacular results that will have your students pumped with excitement for science!
A stove top or microwave to warm the milk Milk (we used 2%, lower fat content is better) White Vinegar or Lemon Juice Bowl Spoon Strainer (or can create your own using cheese cloth or similar) Paper towel Molds (we loved using our Lego minifigures and Dinosaur molds) or other tools for shaping.
Time: 30 to 90 minutes for the experiment, then 2 days for drying. Add in a little extra time for painting once dry!
Directions for Making Milk Plastic
Measure out 1 cup of milk (you can also use chocolate milk and the end result smells amazing! ), this makes about 4 minifigures or 4 dinosaurs. Heat on the stove top in a pot or in the microwave in a heat resistant bowl. You want it to just start steaming. Remove from the heat. Add 4 tsp of vinegar or lemon juice and stir gently.
The amount of vinegar is not exact. We used 4 tbsp by accident and it was fine, just made for a more intense vinegar smell!
You will notice that it immediately begins to curdle. You’re making curds and whey!
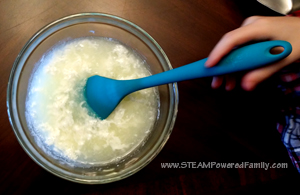
Stir gently for approximately one minute for the full reaction to finish and all the curds to form. Don’t stir aggressively. Be gentle.
Strain off the whey using a strainer or you can use cheese cloth (or similar). Let drip for a few minutes until most of the liquid has drained off. Gently smoosh the curds around in the strainer if needed.
Now remove the curds and place them on a few layers of paper towel. Carefully pat and squish to remove more liquid. You may need to replace the paper towel and repeat a few times. The goal is to remove as much liquid as possible.
You will notice it is kind of crumbly and squishy, but you can smoosh and shape it.
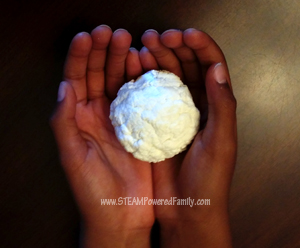
Now you can put it in your molds at this point but we discovered that if you put the curds in a jar or bowl, soaking in vinegar for an hour, you will get a much smoother final product. Plus they are more white if you do this extra step. If you do the extra vinegar soak, once the hour is up, repeat the straining, and paper towel drying process again. This time you will notice it is smoother in texture and no longer crumbly.
How to Colour Milk Plastic
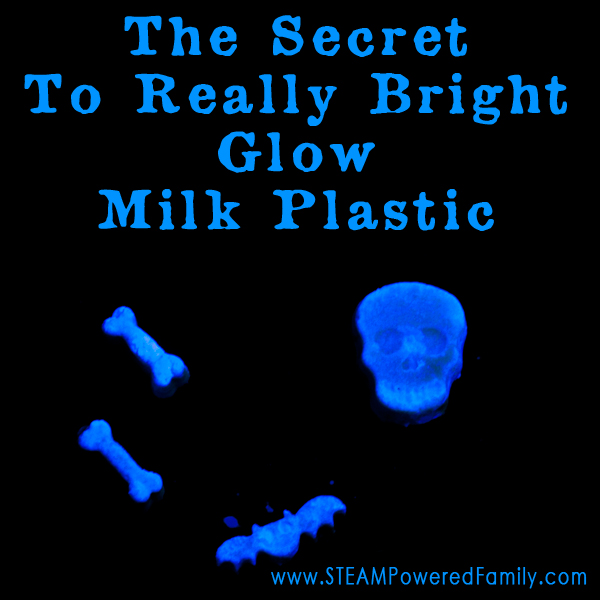
During the vinegar soak you can add some food colouring if you want. Just put a few drops in with the vinegar while it is soaking and it will colour the curds. Or make yours glow in the dark with our favourite trick !
Creating Milk Plastic Toys
Now squish it into your molds. We used silicone molds to make Lego minifigs and dinosaurs.
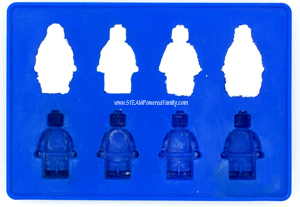
You can also shape it by hand. Roll it to create beads, then use a skewer to put a hole through it before setting it aside to dry. Or flatten it and use some cookie cutters.
The drying process takes time, approximately 2 days depending on your natural humidity levels and how much moisture you removed with the paper towels. But you can remove it from the silicone molds after 24 hours and this will help speed up the drying time.
Once dry, clean up the edges a bit if necessary, just like you would with any other casting. You can do this with just your fingers, a piece of sand paper or other tools. It will be hard plastic now, so it might take a little extra work!
You can paint the final products with either acrylic paints or markers. I used acrylic paints and a sharpie for the faces on mine. Spray them with a clear coat to give them a nice shine once you are finished.
VOILA! Who knew it was so easy, and so much fun, to make plastic from milk!
How Long will Milk Plastic Last?
Our oldest Milk Plastic Toys are over 2 years old now and show no signs of degrading. But we have to be very careful to keep them dry. Why? Because although they are very durable under the right conditions, they are also full compostable!
Breaking Down Milk Plastic
When you are done with your creations, turn it into a science experiment to discover the best method for breaking down milk plastic. Simply set out a bowl of water, a bowl of vinegar, and a bowl of saline solution (salt water). Set some of the pieces in each bowl and compare how they break down to find the best way.
Milk plastic will also break down in a regular compost system within 30 days.
Milk Plastic Chemistry – The Science of How Milk Becomes Plastic
This is a chemistry experiment working with polymers.
Polymers are molecules that have formed a regular chain structure. Milk contains molecules of a protein called Casein. During this reaction between warm milk and acid the casein molecules unfold and form long chains called a polymer. The polymer can be molded and shaped which makes it a plastic. In this case it’s called casein plastic or milk plastic because of the type of molecules that created the plastic.
Learn more in our dedicated resource: What is a Polymer?

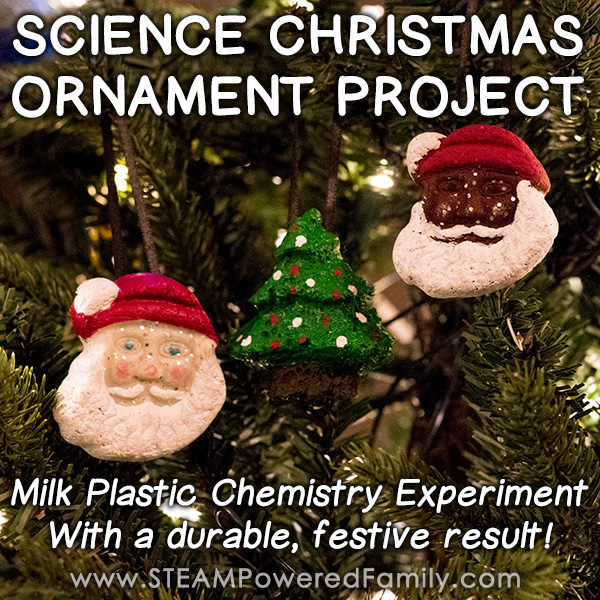
Make Milk Plastic Christmas Ornaments
Make Glow In The Dark Milk Plastic
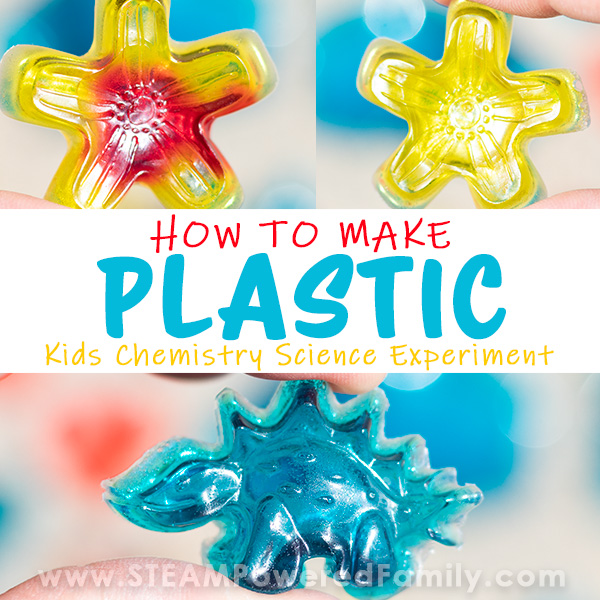
MILK ISN’T THE ONLY WAY TO MAKE PLASTIC
More STEM activities

5 Days of Smart STEM Ideas for Kids
Get started in STEM with easy, engaging activities.

IMAGES